
10 Photoshop Tips and Tricks for Beginners Did you understand 2016 marks 26 years because the miracle of Photoshop got here into our lives. Even in case you’ve in no way used this system, you may’t deny the effect that this image-editing software program has made on our lives. Afterall, the time period Photoshop has end up so integrated into our digital lives that we’ve even turned it into a verb to explain all altered pics… even though the outcome can be a little ridiculous at times.
Once regarded as a complex mystery weapon for picture designers handiest, now almost every person with laptop get admission to can master this tool with almost the same ease as growing a code-unfastened internet site.
From a blemish elimination to including a few spectacular design elements, every person can study the fundamentals of Photoshop. Here are some of our favourite easy suggestions and hints for Photoshop beginners:
- Transform: Change the size of an photograph, rotate, flip or distort it!
- Change the Unit of Measurement
- Magnetic Lasso Tool
- Magic Wand Tool
- Custom Shape Tool
- Layer Styles
- Spot Healing Brush
- Dodge Tool
- Blur Tool
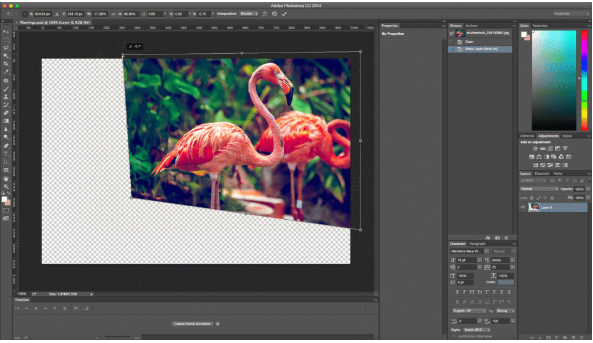
Transform: Change the size of an image, rotate, flip or distort it! (10 Photoshop Tips and Tricks for Beginners )
Click Edit > then click Transform > and select the action you desire.
Or try these shortcuts to make life even easier:
Press Ctrl + T on your keyboard and a bounding box will then seem across the photo, indicating transformation. This manner you may now resize your picture. The exceptional manner to do so is through putting the cursor on one of the rectangle corners of the container and then dragging the nook whilst protecting the Shift key. When you’re completed simply press Enter and also you’re accomplished.
To turn your picture vertically or horizontally press Ctrl + T after which proper click on your mouse. A popup window will appear with some alternatives for rotating and flipping the picture. Select the action you want and when you are achieved press Enter.
To distort or skew an photograph press Ctrl + T after which region the cursor on whichever corner you need to distort. Press Ctrl even as holding your mouse down on whichever corner of the image you’re trying to morph and drag it down to your preferred factor, eventually press Enter to activate.
Change the Unit of Measurement
A short and brief way to exchange among units of measurements that you’re running with is to area your cursor on one of the rulers on your grid (press Ctrl + R to show or conceal the rulers), and proper click on, then select a brand new unit from the context menu. There you’ll find a extensive style of gadgets, from centimeters to pixels, millimeters, points and even percents.
Magnetic Lasso Tool
Found in simple sight for your Photoshop device-panel, the Lasso device is largely guy’s present to photograph enhancing.
This easy selection tool helps you trace and description the precise a part of an photograph which you’re seeking to edit, and then separate it from the relaxation of your image for you to perform positive actions. For instance, you can choose and separate a product from its history. Nearly fool-evidence, the magnetic lasso tool detects the rims of an object, so it works satisfactory when you have a formidable contrast among an object and its heritage with well-defined edges.
To get right of entry to the Magnetic Lasso, click and keep your mouse button down at the Lasso tool till a fly-out menu seems . The Magnetic Lasso is the ultimate one with a small magnet on its icon. Select it after which go to your photo and area your mouse on the edge of the part you need to alter. Click your mouse as soon as, release and just go over the rims of the item you want to pick out (just like you do with scissors when you narrow something out).
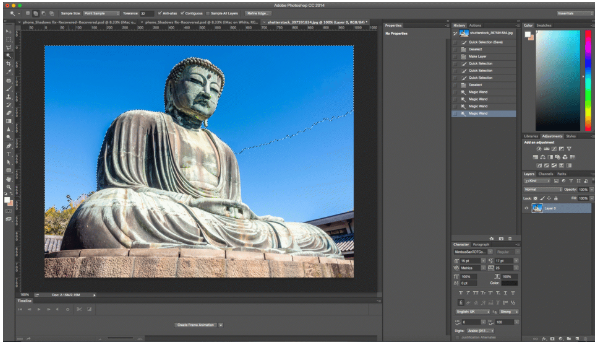
Magic Wand Tool
The Magic Wand is any other selection tool, perfect for whilst you are working with a background this is extra monotone and regular (like a stable shade or clear blue sky).
The Magic Wand device is most usually used to interchange up backgrounds or massive shade blocks. To use it, pick the Magic Wand tool from the gear panel and click at the part of the photograph you need to pick. Make certain that you toggled the “upload to choice” option at the pinnacle bar (icon of squares) so that you can circulate forward with switching up the colours and tones of your selection.
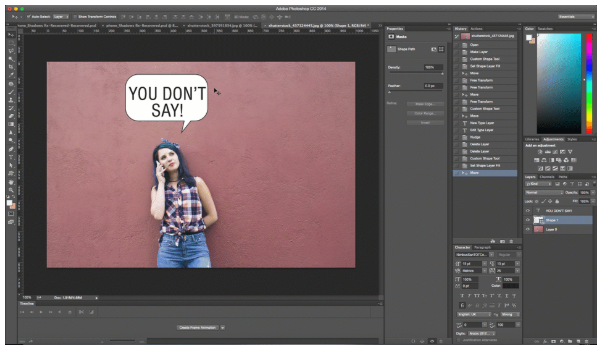
Custom Shape Tool
Did you know that in addition to photograph enhancing, you could also without difficulty add shapes and design factors to your Photoshop creations. The Tool Panel has all of the primary shapes you want like rectangular, line, circle, ellipse etc further to a whole slew of prolonged options. The Custom Shape tool is straightforward to find within the Options Bar, represented by using an icon that type of seems like a puzzle piece.
Access even more shapes by using clicking once more at the small arrow at the proper side of the panel. If you are seeking out banners, speech bubbles or arrows of a wide variety, that is just the device for you.
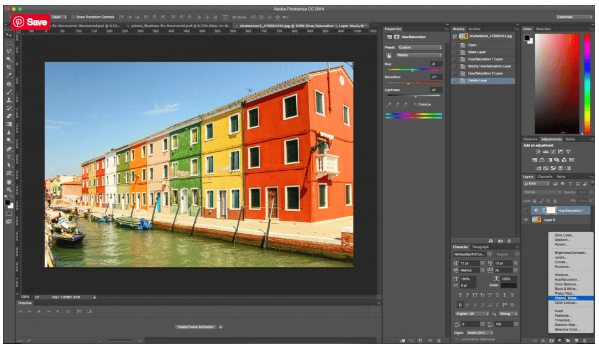
Adjustment Layers
A truely lovely picture typically has extra to it than meets the attention. That’s what makes the Adjustment Layers device so essential. The Adjustment Layers device lets you alter the color and hue of your photo by using adding a pinnacle layer to it. The best element about this feature is via including that more layer, you could totally reverse your adjustments at the same time as maintaining the rest of your image intact. You will find Adjustment Layers inside the backside of the the Layers Panel (a black and white circle icon).
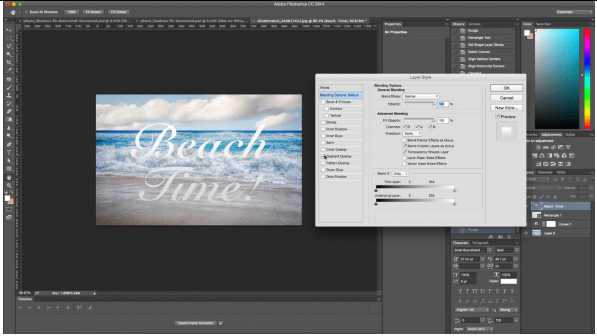
Layer Styles
This is a easy & smooth manner to add a few pizazz in your photo. Layer Styles are computer graphics that can be quick implemented to individual layers of your picture. All you need to do is double click on on a layer and then pick the impact you like.
You can pick from a whole kind of functions, add a stroke or a glow, drop a shadow, and lots extra with only a click on of the mouse. Be careful you don’t overdo it. These results have a propensity to look reasonably-priced when used in excess.
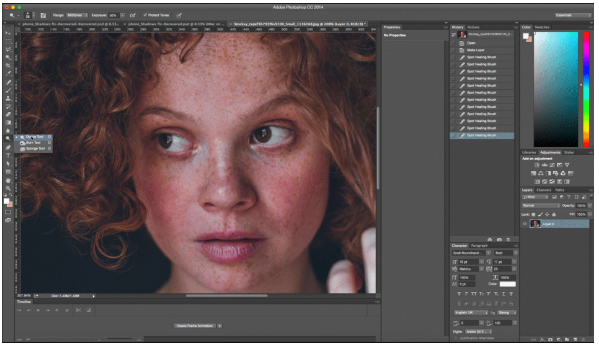
Photoshop Tips and Tricks for Spot Healing Brush
Probably the device that Photoshop is first-class regarded for, this tool changed into created to get rid of life’s little imperfections. The spot header brush is that magic tool that we wish turned into round in our awkward teenage years to make pimples disappear from each picture. Just place the comb over the area you need to “repair”, ensure the comb is a bit bigger than the blemish and click on. Photoshop automatically samples from across the retouched vicinity to shade match your image to perfection.
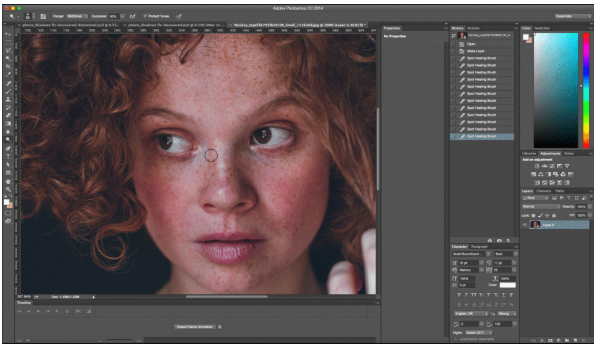
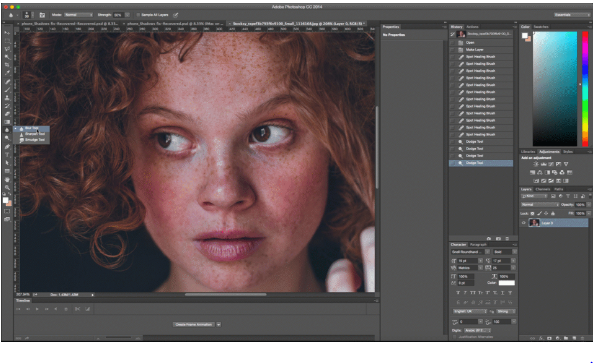
Dodge Tool
The Dodge Tool lightens pixels anyplace you operate it. So in other words, it’s the correct Photoshop device to do away with “worn-out eyes”. Set the Dodge Tool to a smooth brush, go to Range placing in the menu bar’s pull-down and pick highlights, set Exposure on around 20%. Then carefully brush over the eye vicinity. Remember now not to overdo it, or your version will start to seem like an alien. A few simple strokes have to do the process.
Blur Tool (Photoshop Tips and Tricks)
Photoshop Tips and Tricks for Sometimes all you want from Photoshop is to do away with some nice traces. That’s wherein the Blur device comes in. This simple tool works wonders to put off small wrinkles by way of blurring them in just a chunk. Use the Blur tool to easy-out small imperfections just like the wrinkles around the eye or mouth area and simply blur them into the history. Again, be mild and recall now not to overdo it or as opposed to improving your photograph or you can turn out to be spoiling it.
 Photoshop