
Create a Bootable Flash Drive, It is very common to apply a bootable USB power rather than a CD/DVD pressure to put in the operating gadget.
For Windows there are a ton of software applications that help you create bootable USB drives. Even Microsoft has its personal tool.
Of all the available tools, Rufus, a free and open-supply utility, is one of the first-class. In fact, Rufus is one of those gear that every Windows person have to have in their software catalog.
Let me display how you could use Rufus to quick create a bootable flash force in Windows.
Note: This tutorial assumes you have already got the ISO record. If you don’t have the ISO document, you could download it from the developer internet site. Also, make certain that the USB drive you are the use of is at least eight GB and has no essential records in it.
Use Rufus to Create Bootable USB Drive
- First, down load Rufus if you haven’t already. Along with a everyday installer, Rufus additionally comes in a transportable variant. Download the portable version if you don’t want to put in Rufus to your machine. In my case I’ve downloaded the transportable version. After downloading, deploy and open Rufus.
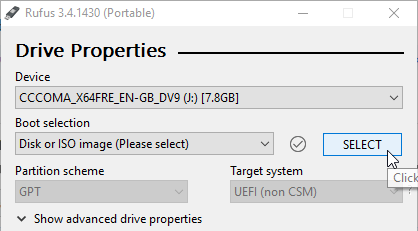
- Plug in the USB power, and you may instantly see it inside the pinnacle drop-down menu. Once you see the power, click on on the “Select” button
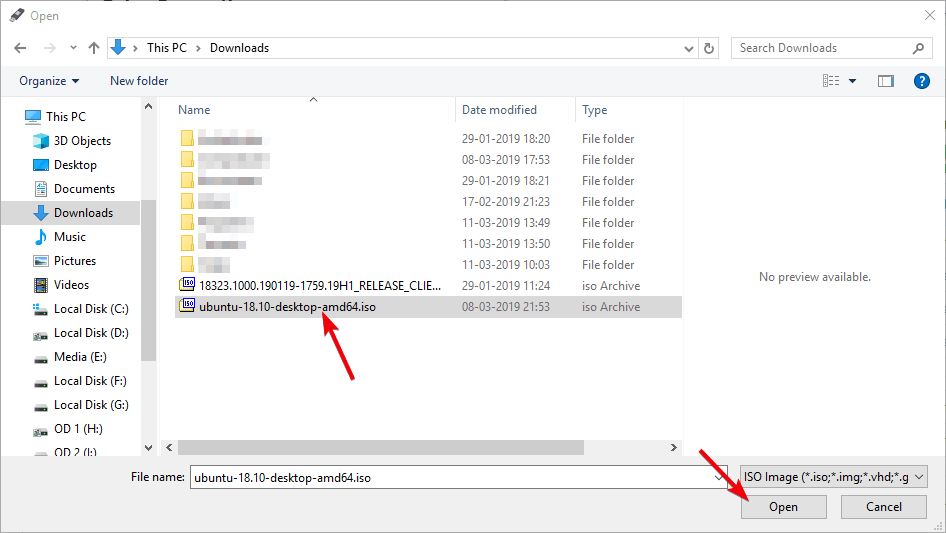
3. In the Browse window go to where you’ve saved your ISO document, choose it, and click on at the “Open” button. In my case, as I wanted to create an Ubuntu bootable USB drive, I selected the Ubuntu ISO. You can pick the ISO of your preference.
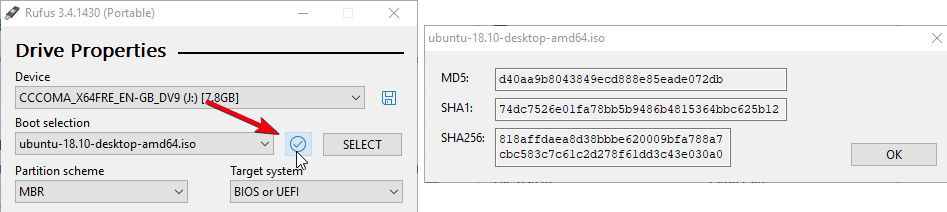
4.(Optional) If you need to, click at the little “Tick” icon subsequent to the “Boot Selection” drop-down menu to compute and spot the MD5, SHA1, and SHA256 checksums of the ISO file. This is beneficial to confirm if the ISO record has been tampered with in any way. Remember how Linux Mint variations are compromised?
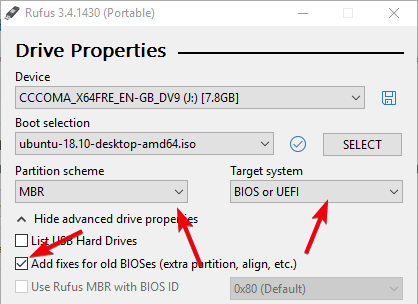
5. Select “MBR” from the Partition Scheme drop-down menu and “BIOS or UEFI” from the Target System drop-down menu. If you are trying to use this bootable USB drive on an vintage device, pick the “Add fixes for vintage BIOSes” checkbox under the “Advanced Drive Properties” section.
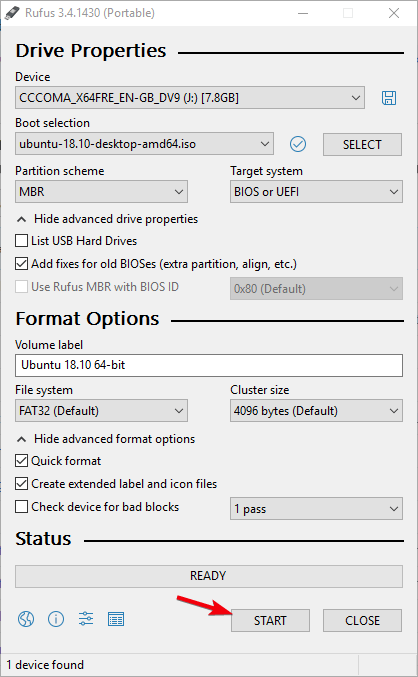
6.(Optional) You can alternate the USB drive call using the “Volume Label” field. Additionally, beneath “Advanced Format Options” make certain that the “Quick Format” checkbox is selected. As the call implies, Quick Format formats the power quicker by skipping the check for bad sectors.
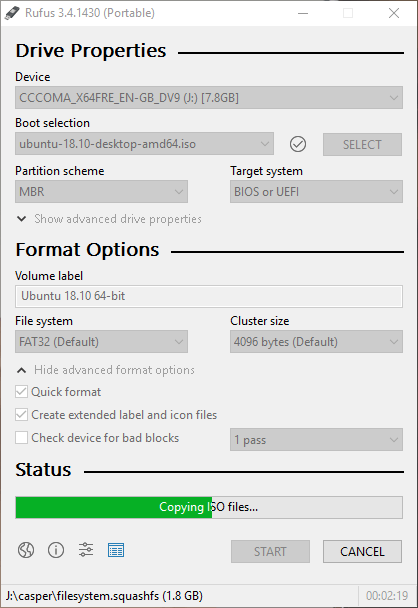
7. Click on the “Start” button.
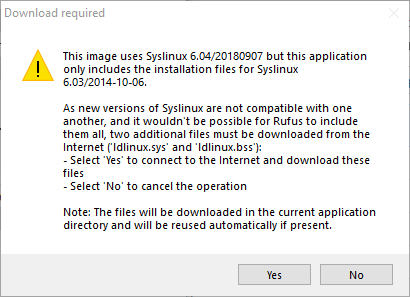
8.Depending on the ISO document, Rufus may set off you to down load additional files. For instance, to create a bootable Ubuntu pressure, Rufus activates you to down load the more moderen version of Syslinux. Just click on at the “Yes” button, and Rufus will deal with the whole thing.
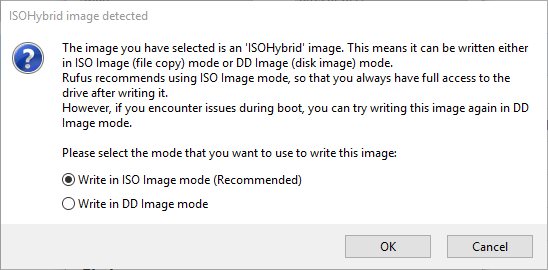
9.In the next activate, choose the advocated “Write in ISO photo mode” choice, and click on the “OK” button. You may see a drive format caution – click on the “OK” button.
10.As soon as you click at the button, Rufus starts to create the bootable USB force. Depending to your USB pressure, it can take a few minutes to finish the creation manner.
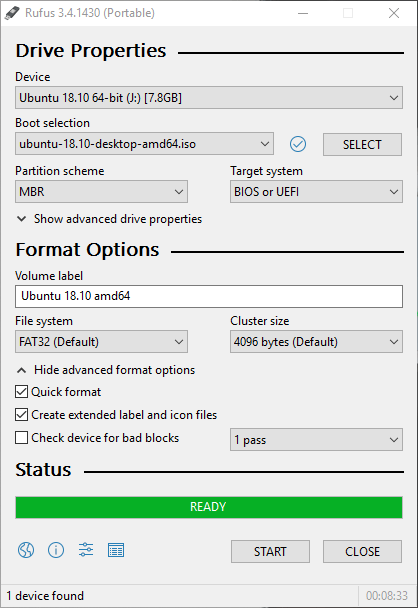
11. Once completed, you may no longer see a completion message however will hear a of completion sound, and the progress bar will turn absolutely inexperienced.
Create a Bootable Flash Drive,That is all. As you can see, it is pretty smooth to create a bootable USB pressure the usage of Rufus