

Install WildFly (JBoss) on CentOS 7, formerly known as JBoss is a pass-platform open source utility runtime written in Java that allows you construct exquisite packages.
WildFly is flexible, light-weight, and it is primarily based on pluggable subsystems that may be introduced or removed as wanted.
This educational explains a way to deploy WildFly software server on CentOS 7.
Install WildFly (JBoss) on CentOS 7, Prerequisites
Install WildFly (JBoss) on CentOS 7, You’ll want to be logged in as a user with sudo access if you want to deploy programs to your CentOS device.
Install WildFly (JBoss) on CentOS 7, Step 1: Install Java OpenJDK
WildFly nine calls for Java SE eight or later. In this educational we are able to installation OpenJDK, the open supply implementation of the Java Platform which is the default Java improvement and runtime in CentOS 7.
Install the OpenJDK bundle with the aid of jogging:
sudo yum install java-1.8.0-openjdk-develInstall WildFly (JBoss) on CentOS 7, Step 2: Create a User
Running WildFly as the root consumer is a protection chance and no longer considered first-class practice.
To create a new machine person and institution named wildfly with domestic directory /choose/wildfly run:
sudo groupadd -r wildflysudo useradd -r -g wildfly -d /opt/wildfly -s /sbin/nologin wildflyInstall WildFly (JBoss) on CentOS 7, Step 3: Install WildFly
At the time of writing, the trendy model of WildFly is 16.Zero.0. Before continuing with the next step you should take a look at the download page for a new edition. If there may be a new edition update the WILDFLY_VERSION variable inside the command beneath.
Download the WildFly archive within the /tmp directory the usage of the subsequent wget command:
WILDFLY_VERSION=16.0.0.Finalwget https://download.jboss.org/wildfly/$WILDFLY_VERSION/wildfly-$WILDFLY_VERSION.tar.gz -P /tmpWhen the down load is completed, unpack the tar.Gz file and move it to the /decide listing:
sudo tar xf /tmp/wildfly-$WILDFLY_VERSION.tar.gz -C /opt/Next, create a symbolic hyperlink wildfly so that it will point to the WildFly set up listing:
sudo ln -s /opt/wildfly-$WILDFLY_VERSION /opt/wildflyWildFly will run below the wildfly consumer which desires to have get right of entry to to the WildFly installation directory. Change the directory ownership to user and organization wildfly with the subsequent chown command:
sudo chown -RH wildfly: /opt/wildflyInstall WildFly (JBoss) on CentOS 7, Step 4: Configure Systemd
The WildFly bundle includes files important to run WildFly as a provider.
Start by creating a directory so one can hold the WildFly configuration record:
sudo mkdir -p /etc/wildflyCopy the configuration record to the /and so forth/wildfly directory:
sudo cp /opt/wildfly/docs/contrib/scripts/systemd/wildfly.conf /etc/wildfly/This record permits you to specify the WildFly mode and bind cope with. By default, WildFly will run in a standalone mode and will concentrate on all interfaces. You can edit the document in line with your needs.
               /etc/wildfly/wildfly.conf

# The configuration you want to run
WILDFLY_CONFIG=standalone.xml

# The mode you want to run
WILDFLY_MODE=standalone

# The address to bind to
WILDFLY_BIND=0.0.0.0
Next copy the WildFly launch.sh script to the /opt/wildfly/bin/ directory:
sudo cp /opt/wildfly/docs/contrib/scripts/systemd/launch.sh /opt/wildfly/bin/The scripts inner bin directory ought to have executable flag:
sudo sh -c 'chmod +x /opt/wildfly/bin/*.sh'Copy the systemd unit file named to the /and so forth/systemd/machine/ listing:
sudo cp /opt/wildfly/docs/contrib/scripts/systemd/wildfly.service /etc/systemd/system/Notify systemd that we created a brand new unit report:
sudo systemctl daemon-reloadStart the WildFly provider an allow it to be routinely started at boot time by way of running:
sudo systemctl start wildfly sudo systemctl enable wildflyVerify that the service is running:
sudo systemctl status wildfly● wildfly.service - The WildFly Application Server
Loaded: loaded (/etc/systemd/system/wildfly.service; disabled; vendor preset: disabled)
Active: active (running) since Fri 2019-03-01 20:13:39 UTC; 3s ago
Main PID: 3680 (launch.sh)
CGroup: /system.slice/wildfly.serviceInstall WildFly (JBoss) on CentOS 7, Step 5: Adjust the Firewall
If your server is protected by way of a firewall and you want to access the WildFly example from the outdoor of the local network you also want to open port 8080.
Use the following instructions to open the essential port:
sudo firewall-cmd --zone=public --permanent --add-port=8080/tcpsudo firewall-cmd --reloadWhen going for walks a WildFly software in a production environment most probable you will have a load balancer or opposite proxy and it’s a first-class exercise to limit get right of entry to to port 8080 simplest for your internal community.
Install WildFly (JBoss) on CentOS 7, Step 6: Configure WildFly Authentication
Now that WildFly is mounted and walking the following step is to create a user who may be capable of connect the use of the administration console or remotely using the CLI. To upload a brand new person use the upload-consumer.Sh script that is positioned the WildFly’s bin directory:
sudo /opt/wildfly/bin/add-user.shYou’ll be asked what type of user do you wish to add:
What type of user do you wish to add?
 a) Management User (mgmt-users.properties)
 b) Application User (application-users.properties)
(a):
Select a and hit Enter:
Next, the script will activate you to enter the info of the new user:
Enter the details of the new user to add.
Using realm 'ManagementRealm' as discovered from the existing property files.
Username : linuxize
Password recommendations are listed below. To modify these restrictions edit the add-user.properties configuration file.
 - The password should be different from the username
 - The password should not be one of the following restricted values {root, admin, administrator}
 - The password should contain at least 8 characters, 1 alphabetic character(s), 1 digit(s), 1 non-alphanumeric symbol(s)
Password :
Re-enter Password :
What groups do you want this user to belong to? (Please enter a comma separated list, or leave blank for none)[  ]:
About to add user 'linuxize' for realm 'ManagementRealm'
Is this correct yes/no? yes
Added user 'linuxize' to file '/opt/wildfly-16.0.0.Final/standalone/configuration/mgmt-users.properties'
Added user 'linuxize' to file '/opt/wildfly-16.0.0.Final/domain/configuration/mgmt-users.properties'
Added user 'linuxize' with groups  to file '/opt/wildfly-16.0.0.Final/standalone/configuration/mgmt-groups.properties'
Added user 'linuxize' with groups  to file '/opt/wildfly-16.0.0.Final/domain/configuration/mgmt-groups.properties'
Is this new user going to be used for one AS process to connect to another AS process?
e.g. for a slave host controller connecting to the master or for a Remoting connection for server to server EJB calls.
yes/no? yes
To represent the user add the following to the server-identities definition <secret value="UGFuMjNkZWo3NyNA" />
The new consumer can be delivered to the houses files used for authentication.
Install WildFly (JBoss) on CentOS 7, Step 6: Test the WildFly Installation
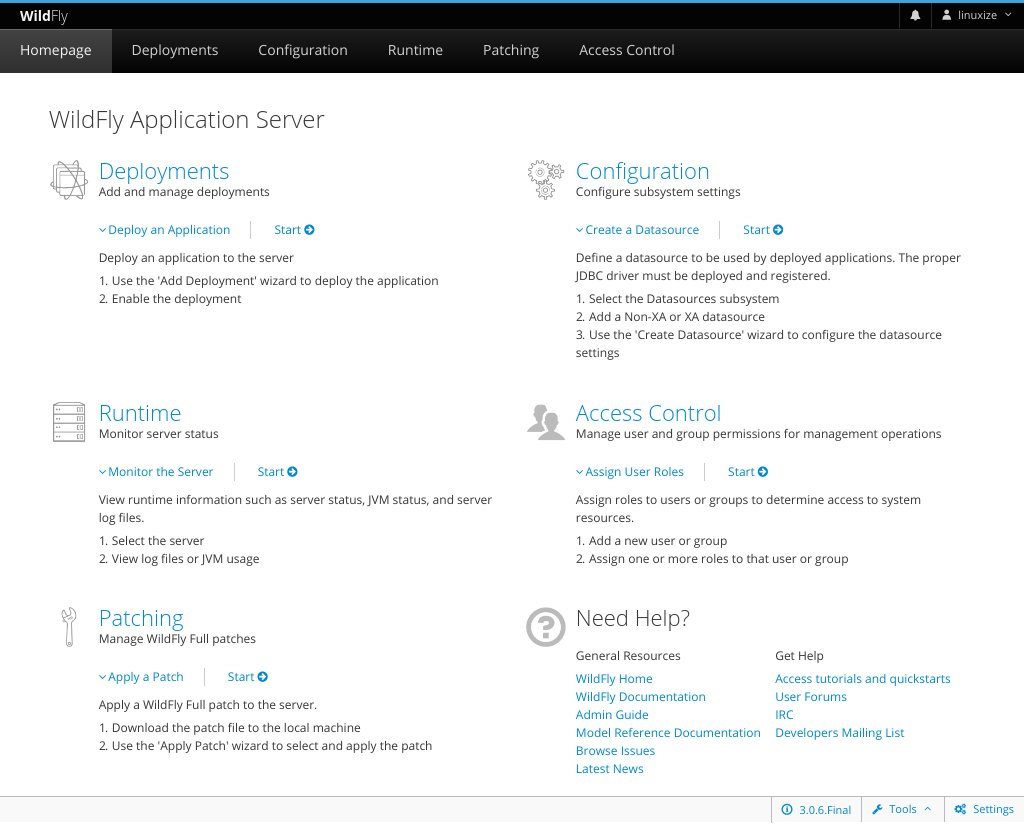
To get admission to the default WildFly web page, open your browser and kind:
http://<your_domain_or_IP_address>:8080Assuming the set up is a success, a display similar to the following will seem:

Install WildFly (JBoss) on CentOS 7, Step 7: Access WildFly Administration Console
Command-Line Interface
To get right of entry to the WildFly Administration Console from the command line you may use the jboss-cli.Sh script.
Navigate to the WildFly’s bin directory and run the script with the –join alternative:
cd /opt/wildfly/bin/./jboss-cli.sh --connectYou can be requested to go into your administrative username and password (created in step 6):
Authenticating against security realm: ManagementRealm
Username: linuxize
Password:
Once you login the console set off will trade to [standalone@localhost:9990 /]. Type assist to get a list of instructions and command syntax.
From right here you can install and undeploy your programs, control users and organizations and configure and screen WildFly server.
Web Interface
If you opt to manage your server from the GUI, WildFly also provides a web-based totally console.
By default, the WildFly management console is to be had handiest from localhost at http://localhost:9990/console. Sign in using the person you’ve got created in step 6.
If you need to get right of entry to the console from faraway places you’ll need to make small adjustments to the wildfly.Service, wildfly.Conf and release.Sh files.
Open the wildfly.Conf and append WILDFLY_CONSOLE_BIND=zero.0.0.Zero on the give up of the report.
     /etc/wildfly/wildfly.conf

# The configuration you want to run
WILDFLY_CONFIG=standalone.xml

# The mode you want to run
WILDFLY_MODE=standalone

# The address to bind to
WILDFLY_BIND=0.0.0.0

# The address console to bind to
WILDFLY_CONSOLE_BIND=0.0.0.0
Open the launch.Sh and edit the highlighted strains:
       /opt/wildfly/bin/launch.sh

#!/bin/bash

if [ "x$WILDFLY_HOME" = "x" ]; then
    WILDFLY_HOME="/opt/wildfly"
fi

if [[ "$1" == "domain" ]]; then
    $WILDFLY_HOME/bin/domain.sh -c $2 -b $3 -bmanagement $4
else
    $WILDFLY_HOME/bin/standalone.sh -c $2 -b $3 -bmanagement $4
fi
Restart the service for changes to take effect:
sudo systemctl restart wildflyOpen the wildfly.Service and edit the highlighted strains:
     /etc/systemd/system/wildfly.service

[Unit]
Description=The WildFly Application Server
After=syslog.target network.target
Before=httpd.service

[Service]
Environment=LAUNCH_JBOSS_IN_BACKGROUND=1
EnvironmentFile=-/etc/wildfly/wildfly.conf
User=wildfly
LimitNOFILE=102642
PIDFile=/var/run/wildfly/wildfly.pid
ExecStart=/opt/wildfly/bin/launch.sh $WILDFLY_MODE $WILDFLY_CONFIG $WILDFLY_BIND $WILDFLY_CONSOLE_BIND
StandardOutput=null

[Install]
WantedBy=multi-user.target
Create the /var/run/wildfly directory and set correct permissions:
sudo mkdir /var/run/wildfly/sudo chown wildfly: /var/run/wildfly/Notify systemd that the unit file was changed:
sudo systemctl daemon-reload
Restart the WildFly service by executing:
sudo systemctl restart wildflyAssuming that port 9990 is not blocked in your firewall, you must be capable of access the WildFly management console at http://:9990/console.
Conclusion
You have correctly installed WildFly to your CentOS 7 system. You can now go to the professional WildFly Documentation and analyze more approximately the WildFly functions.
If you hit a hassle or have feedback, depart a remark under.