
EC2 Setup with Ubuntu,Very long term back I had published an editorial approximately Amazon Cloud set up, nowadays Amazon Web Services is presenting three hundred and sixty five days unfastened trial for micro instance with 700 MB RAM. Now they simplified few interface placing for installation manner, this submit will provide an explanation for you the way to setup an Amazon micro instance with Ubuntu working gadget and XAMPP server. Try this to your first net project.

EC2 Setup with Ubuntu,Getting started with Amazon Web Services EC2(Elastic Compute Cloud)
EC2 Setup with Ubuntu,Very first you have to create an account in Amazon.Com with valid credit card after which set off micro loose tie. Click right here to get right of entry to Amazon console dashboard.
Step 1
After Amazon console login you find the subsequent display screen, pick EC2 from Compute class.

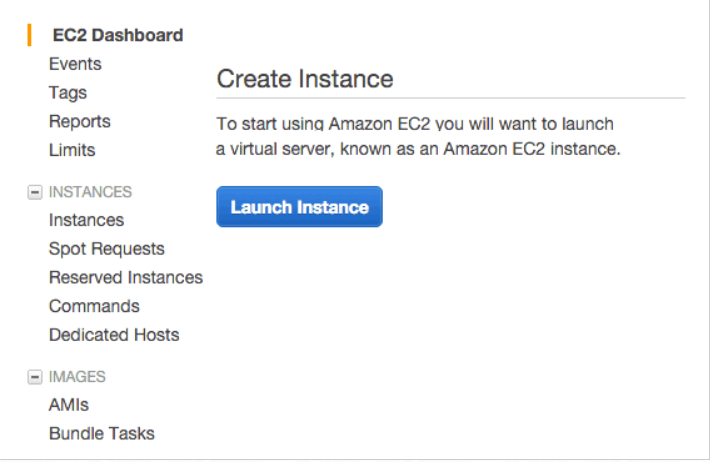
Step 2
Click Launch Instance button.
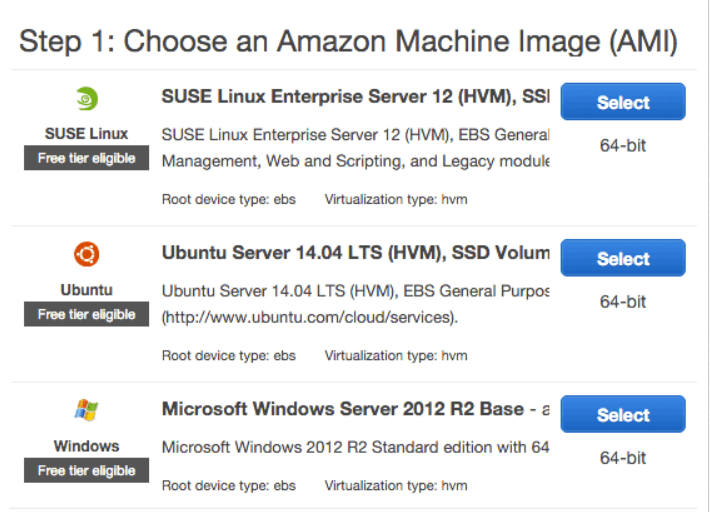
Step 3
Now pick running device on your net server, I endorse use Ubuntu for greater package deal blessings. Make sure, that must be indexed in unfastened tier.
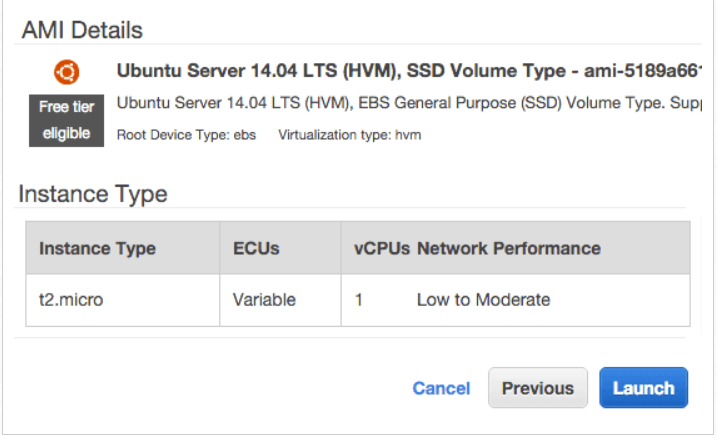
Step 4
You find the following screen, now click Launch button.
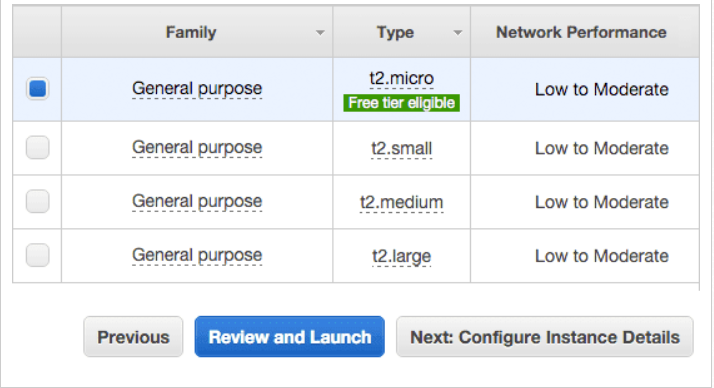
Step 5
Here you can modify your server type, but initially explore things with free tier.
Creating Amazon Key File – Authentication
Most important part in this installation process.
Step 6
Here choose Create a new pair key
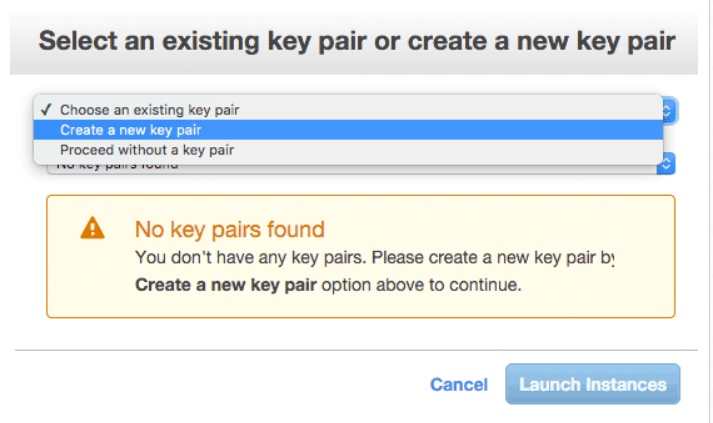
Step 7
Give valid name and click to Download Key Pair. You will get an .pem file.

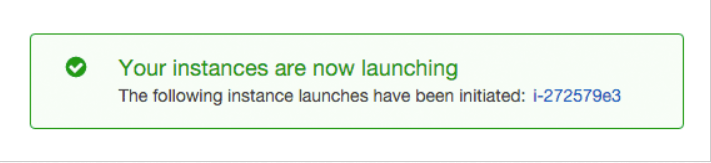
Step 8
Instance has been created successfully.
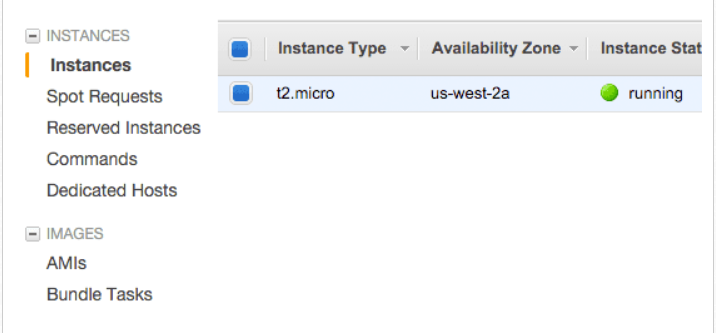
EC2 Setup,Firewall Security Settings
Step 9
You will find the instance status here.
Step 10
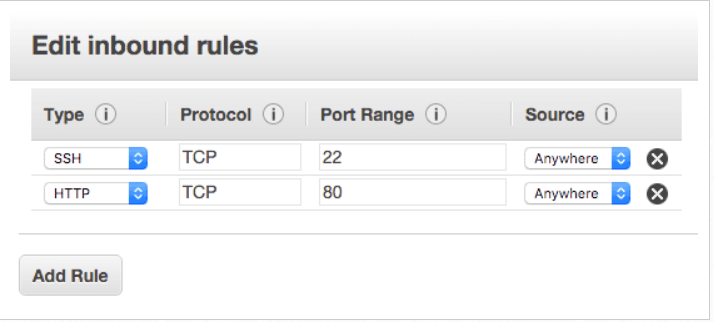
Select the instance box and scroll down the page, you will find inbound rules for firewall security
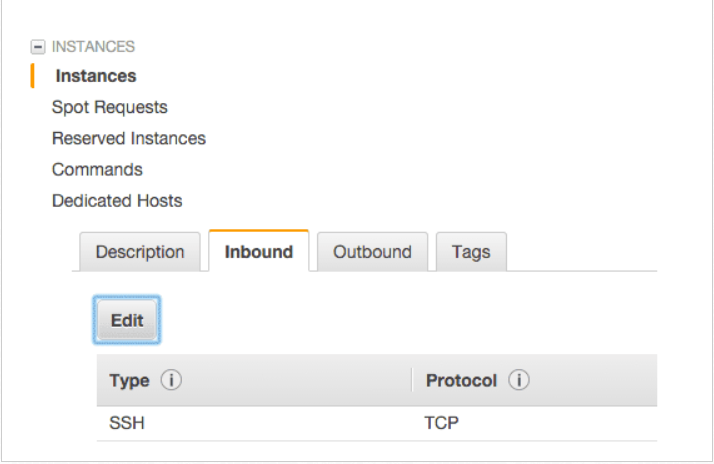
Step 11
Add HTTP rule for web server access.
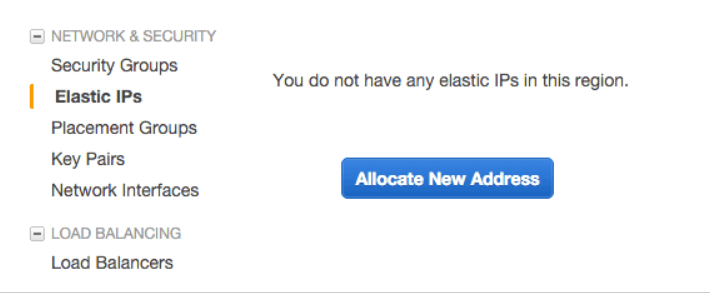
EC2 Setup with Ubuntu,Elastic IP – Create Static IP Address
EC2 Setup with Ubuntu,Basically Amazon instance will provide you a dynamic public DNS name, this is not stable. So you need a static IP.
Step 12
Go to Network & Security category and select Elastic IPs, click Allocate New Address
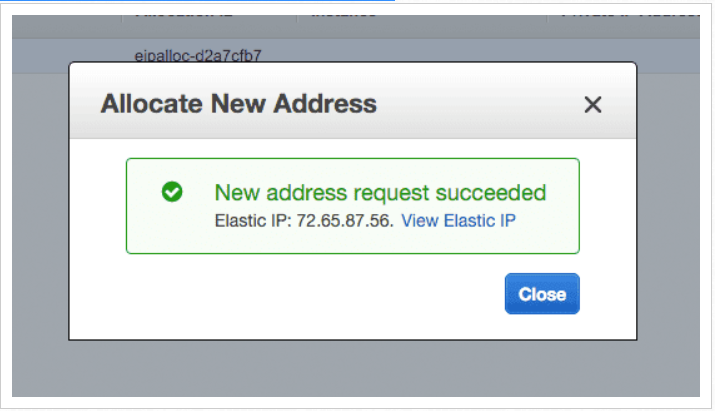
Step 13
Amazon will provide you a random IP address.
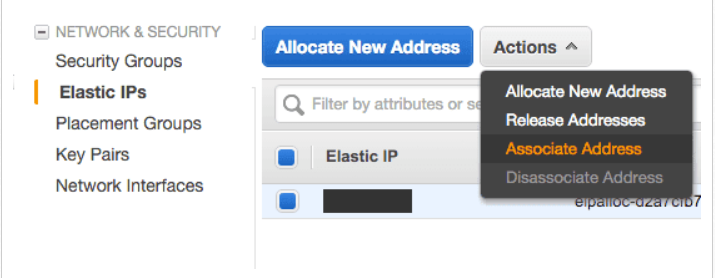
Step 14
Now associate IP address with instance box.
Step 15
Choose instance box here.
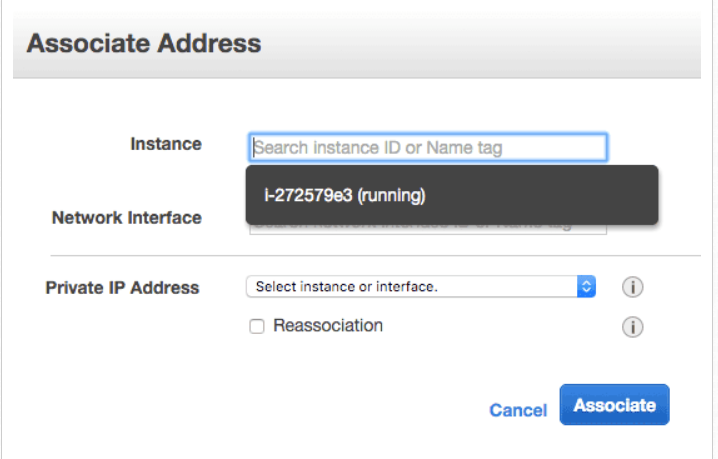
Step 16
Click Associate address.
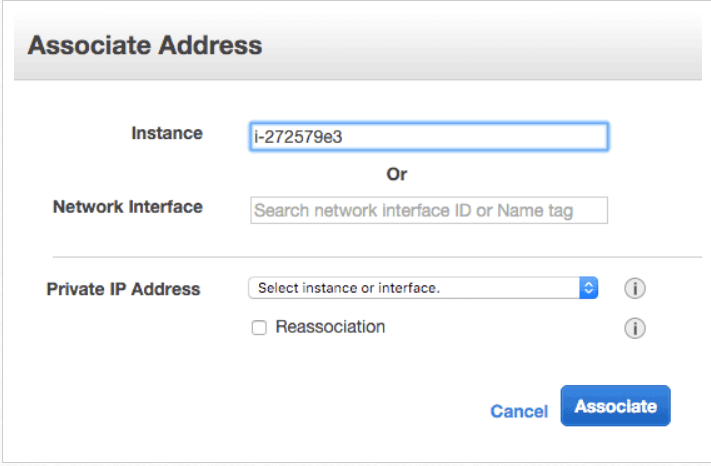
Step 17
Associated IP address with instance.

Linux & MAC connection
Executing following command with Linux or MAC terminal, you can directly access your box.
ssh -i keyname.pem ubuntu@IP_ADDRESSSometimes you will get following error.
Permissions 0640 for 'keyname.pem' are too open.
It is required that your private key files are NOT accessible by others.
This private key will be ignored.
Load key "keyname.pem": bad permissions
Permission denied (publickey).
Give only READ permission for .pem file, then execute SSH command again
sudo chmod 400 keyname.pemEC2 Setup with Ubuntu ,Windows connection
You ought to down load Putty and PuttyGen softwares. Click this Amazon Windows Connectivity hyperlink, comply with steps below Windows join using Putty
ubuntu@ip-172-31-19-204:~$ sudo su
root@ip-172-31-19-204:/home/ubuntu#
This will update Ubuntu OS Packages
sudo apt-get updateStop Default Apache
sudo /etc/inid.d/apache stopEC2 Setup with Ubuntu,XAMPP Installation Commands for Ubuntu
Download XAMPP for 64 bit
wget https://www.apachefriends.org/xampp-files/7.0.23/xampp-linux-x64-7.0.23-0-installer.runEC2 Setup with Ubuntu,Make Execute Installation
sudo chmod +x xampp-linux-x64-7.0.23-0-installer.runRun Installation
sudo ./xampp-linux-x64-7.0.23-0-installer.runXAMPP instructions
Select the components you want to install; clear the components you do not want to install. Click Next when you are ready to continue.
XAMPP Core Files : Y (Cannot be edited)
XAMPP Developer Files [Y/n] : Y
Is the selection above correct? [Y/n]: Y

Installation Directory
XAMPP will be installed to /opt/lampp
Press [Enter] to continue:
Do you want to continue? [Y/n]:Y
Run XAMPP
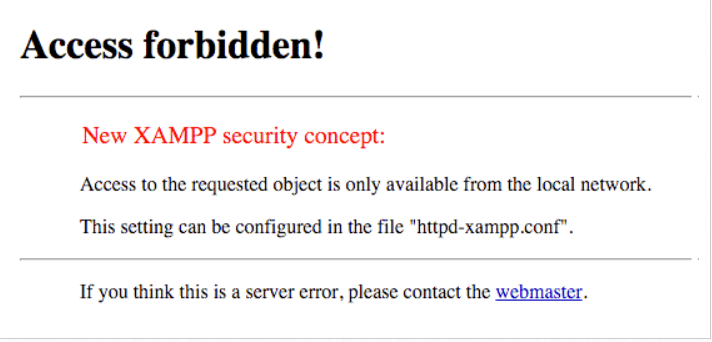
sudo /opt/lampp/lampp startXAMPP Access Forbidden
Open your browser and access http://IP-ADDRESS/ you will find this Access forbidden screen.
XAMPP Configurations
Edit XAMPP configurations.
vi /opt/lampp/etc/extra/httpd-xampp.conf<LocationMatch "^/(?i:(?:xampp|security|licenses|phpmyadmin|webalizer|server-status|server-info))">
Require local
ErrorDocument 403 /error/XAMPP_FORBIDDEN.html.var
</LocationMatch>
to
<LocationMatch "^/(?i:(?:xampp|security|licenses|phpmyadmin|webalizer|server-status|server-info))">
Order deny,allow
Allow from all
Allow from ::1 127.0.0.0/8 \
fc00::/7 10.0.0.0/8 172.16.0.0/12 192.168.0.0/16 \
fe80::/10 169.254.0.0/16
ErrorDocument 403 /error/XAMPP_FORBIDDEN.html.var
</LocationMatch>Restart XAMPP
sudo /opt/lampp/lampp restartSecurity Settings
sudo /opt/lampp/xampp securityXAMPP: Your XAMPP pages are NOT secured by a password.
XAMPP: Do you want to set a password? [yes]
XAMPP: Your XAMPP pages are NOT secured by a password.
XAMPP: Do you want to set a password? [yes] no
XAMPP: MySQL is accessable via network.
XAMPP: Normaly that's not recommended. Do you want me to turn it off? [yes] yes
XAMPP: Turned off.
XAMPP: Stopping MySQL...ok.
XAMPP: Starting MySQL...ok.
XAMPP: The MySQL/phpMyAdmin user pma has no password set!!!
XAMPP: Do you want to set a password? [yes] yes
XAMPP: Password:*******
XAMPP: Password (again):*******
XAMPP: Setting new MySQL pma password.
XAMPP: Setting phpMyAdmin's pma password to the new one.
XAMPP: MySQL has no root passwort set!!!
XAMPP: Do you want to set a password? [yes] yes
XAMPP: Write the password somewhere down to make sure you won't forget it!!!
XAMPP: Password:*******
XAMPP: Password (again):*******
XAMPP: Setting new MySQL root password.
XAMPP: Change phpMyAdmin's authentication method.
XAMPP: The FTP password for user 'daemon' is still set to 'xampp'.
XAMPP: Do you want to change the password? [yes] no
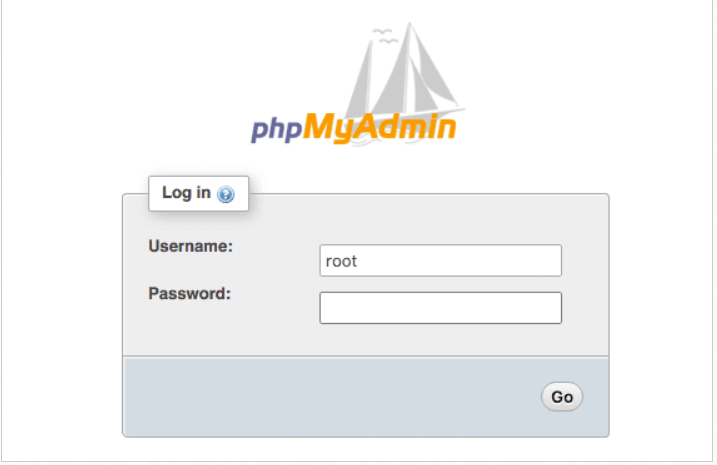
XAMPP: Done.PhpMyAdmin
Access PhyMyAdmin at http://IP-Address/phpmyadmin/
Domain Settings
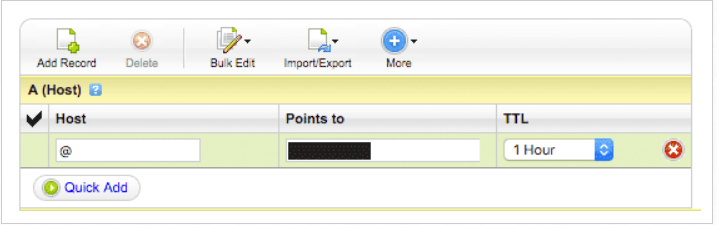
If you own a domain address, go to domain DNS(Domain name settings). Add host value @ points to IP-Address
sudo port install puttyTo get puttygen to output a .PEM file:
puttygen keyname.ppk -O private-openssh -o keyname.pemFile Uploads
Download right here and deploy into your PC. Click this Amazon FileZilla Connectivity link, observe steps underneath FileZilla – File Uploads
Copy your venture folder from /home/ubuntu/ listing to XAMPP htdocs folder.
sudo cp -R WebProjectFolder /opt/lampp/htdocs/SSL Certificate
Find extra data approximately Custom SSL Certificate Installation for Amazon EC2 serve. If you want to activate free SSL certificates in your website
Domain Redirection using .htaccess
Create a .htaccess file and copy into /opt/lampp/htdocs/ directory.
RewriteEngine On
RewriteCond %{HTTP_HOST} ^yourdomain.com
RewriteRule (.*) http://www.yourdomain.com/$1 [R=301,L]

RewriteCond %{HTTP_HOST} ^www\.yourdomain\.com$
RewriteCond %{REQUEST_URI} !^/WebProjectFolder/
RewriteRule (.*) /WebProjectFolder/$1
Now access your domain http://YourDomain.com/