
Erase your MacBook Pro’s hard disk with these easy steps!

Wipe Your MacBook Pro,The MacBook Pro, as effective as it is, would possibly need to have its important garage unit erased, either because you are promoting the laptop or because you genuinely need to start afresh with a smooth disk. This guide explains how to do that, masking the way to make a backup of your MacBook Pro ahead, and a way to wipe its difficult disk of all of the facts it has collected because you started using it.
How to Wipe a MacBook Pro
If you need to store all the files (e.G. Documents, pics, song) you’ve created at the same time as the usage of your MacBook Pro, you have to first talk to the phase beneath, and is the reason how to make a backup of your difficult disk. However, if you’ve already subsidized up your disk, you can wipe it with the aid of finishing the following procedure (note: this calls for that the MacBook is hooked up to the internet).
First, you have to boot up the MacBook Pro so that it begins in Recovery Mode. This can be executed by pressing and protecting Command + R when turning on or restarting the Mac.
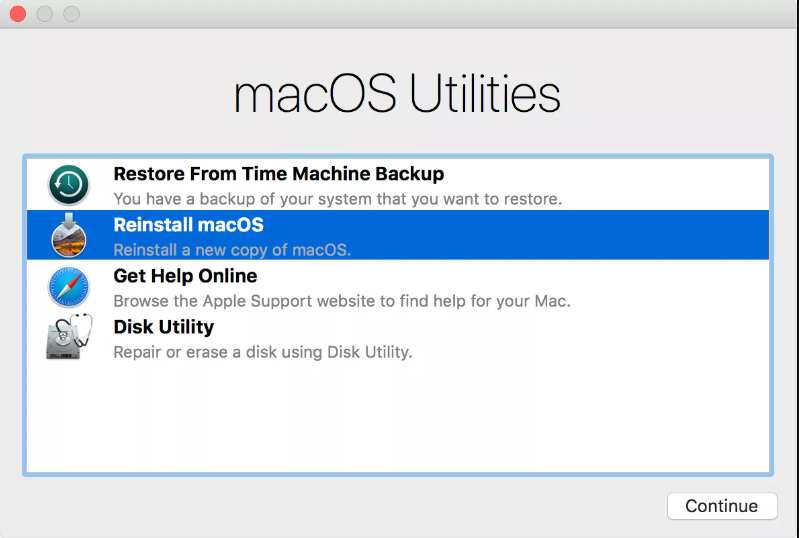
Once in Recovery Mode and on the macOS Utilities display, you have to then do the subsequent:
- Click Disk Utility
- Click Continue
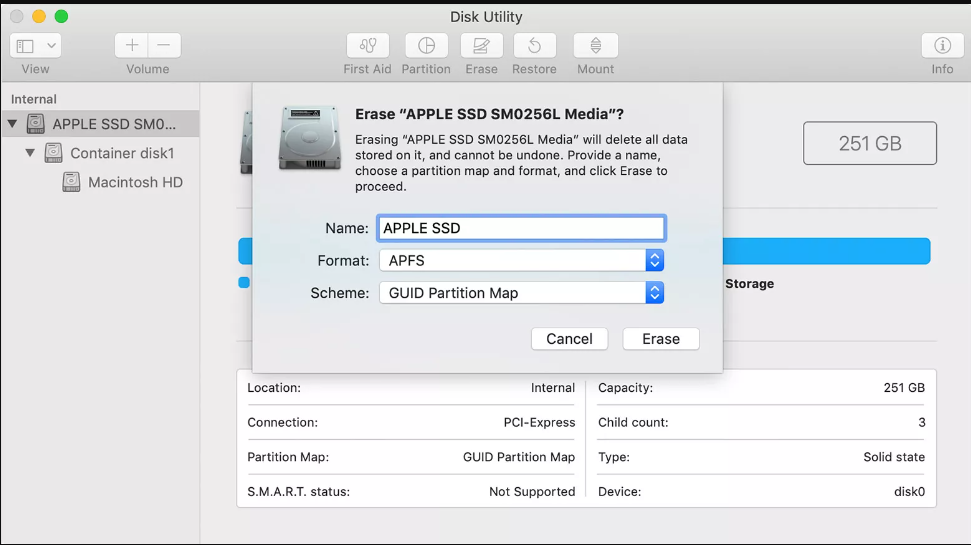
- Select your difficult disk. You have to click on the disk, as opposed to any ‘volumes’ nested in the disk (disks usually have such names as ‘APPLE SSD’, even as volumes may have such names as ‘Macintosh HD’)
- Click the Erase button
- Enter a call for the disk (e.G. ‘APPLE SSD’, ‘Mac HD’, or something else you locate suitable)
- If you are the usage of macOS High Sierra or later, select APFS for the Format discipline. If you are the usage of macOS Sierra or in advance, choose Mac OS Extended (Journaled)
- Choose GUID Partition Map for the Scheme subject (if proven)
- Click Erase
Methods for How to Wipe a MacBook Pro
This will begin the wiping method. However, regardless of whether or not you are selling your MacBook Pro or the usage of it again yourself, it is an awesome concept to reinstall macOS after the disk has been erased. Making sure that your MacBook is plugged into your strength supply, right here’s what you do:
- On the macOS Utilities display screen, click on Reinstall macOS
- Click Continue
- Follow the onscreen commands to complete the installation
Once the set up has been completed, you’ll be added to the setup/Welcome display. If you’re promoting your MacBook Pro you must press Command + Q, which shuts down the Mac on the setup display screen, thereby leaving the pc in a ‘factory’ nation ready for its subsequent owner.
However, in case you’re preserving onto your MacBook Pro, you should manifestly observe the onscreen commands to complete the setup process.
How to Make a Backup of Your MacBook Pro
Of route, earlier than you erase your MacBook Pro’s difficult disk, it is obviously a terrific idea to create a backup. This applies irrespective of whether you’re wiping the disk to offer the gadget a fresh start, or you’re selling it, but nonetheless need to use your saved documents with a new MacBook.
Here’s what you do to create a backup using Time Machine, although there also are 0.33-party backup programs you could use:
- Connect the outside garage device that will comprise the backup.
- Click the Apple icon inside the top-left corner of the MacBook Pro’s display
- Select System Preferences
- Select Time Machine
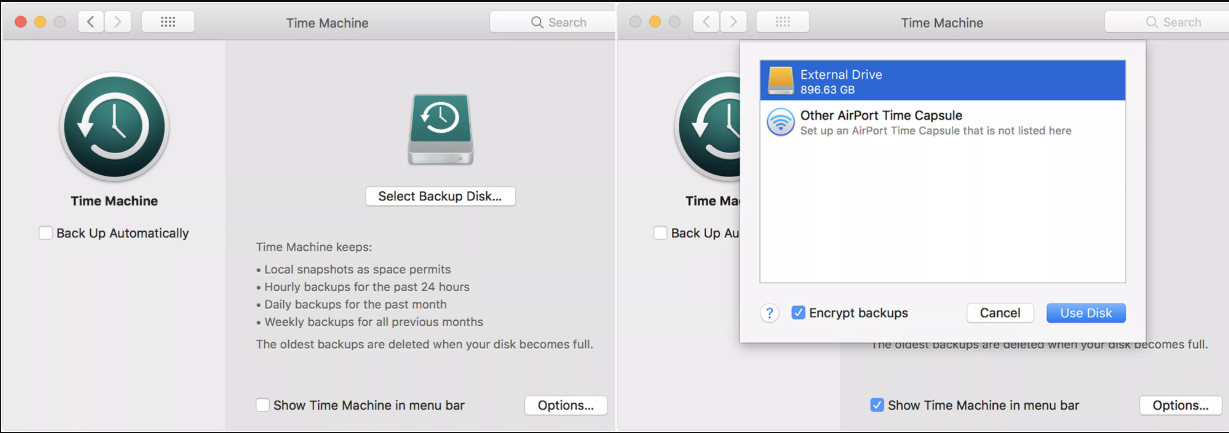
- Click Select Backup Disk
- Choose your outside pressure, then click on Encrypt backups after which Use Disk
Wipe Your MacBook Pro
If it is not already within the ‘ON’ role, you’ll additionally must click on the ON button after clicking Use Disk. Once this has been carried out, your MacBook Pro will then begin growing a backup. And later on in the wiping process, after your MacBook Pro has been wiped down to its manufacturing unit settings, you could use the backup you’ve made by reconnecting your outside tough disk to the MacBook after which following the onscreen commands.
Also, if you’re selling your MacBook Pro, yet another component you have to generally do earlier than wiping its hard disk is signing out of iTunes, iCloud and iMessage.
For iCloud, take the following path: Click the Apple icon within the pinnacle-left nook of the display screen > System Preferences… > iCloud > Sign Out
iCloud, take the following path
For iTunes: Open iTunes > Account > Authorizations > De-authorize This Computer… > Enter your Apple ID and Password > De-authorize
And for iMessage: Press Command + Space Bar > Type Messages and press Enter > Messages (within the menu bar at the top of the Mac’s display screen) > Preferences… > iMessage > Sign Out