Install CouchDB on CentOS 7 Apache CouchDB is a free and open-source NoSQL database advanced via the Apache Software Foundation.
CouchDB server shops its records in named databases which includes files with JSON structure. Each record includes some of fields and attachments. Fields can consist of textual content, numbers, lists, booleans, more. It includes a RESTful HTTP API that lets in you to study, create, edit and delete database files.
In this educational, we will give an explanation for a way to deploy the present day model of CouchDB on CentOS 7.
Install CouchDB on CentOS 7,Prerequisites
To be able to deploy new programs on your CentOS device, you need to be logged in as a consumer with sudo privileges.
Install CouchDB on CentOS 7,Enable CouchDB Repository
The CouchDB repository relies upon at the EPEL repository](https://linuxize.Com/post/how-to-enable-epel-repository-on-centos/). If the EPEL repository is not enabled to your system, permit it by using typing:.
sudo yum install epel-release
Next, open your editor of choice and create the CouchDB repository file:
sudo nano /etc/yum.repos.d/bintray-apache-couchdb-rpm.repoPaste the subsequent content into the record:
/etc/yum.repos.d/bintray-apache-couchdb-rpm.repo[bintray--apache-couchdb-rpm]
name=bintray--apache-couchdb-rpm
baseurl=http://apache.bintray.com/couchdb-rpm/el$releasever/$basearch/
gpgcheck=0
repo_gpgcheck=0
enabled=1Save the document and near the editor.
Install CouchDB on CentOS
similarly Now that the repository is enabled, you may install the CouchDB programs the use of the following command:
yum install couchdbOnce the set up is completed, allow and begin the CouchDB service:
sudo systemctl start couchdb
sudo systemctl enable couchdb
Apache CouchDB data and configuration files are stored in the /opt/couchdb directory. To create an admin account open the local.ini file and add a line under the [admins] section in the format username = password.
sudo nano /opt/couchdb/etc/local.ini/opt/couchdb/etc/local.ini
[admins]
admin = mysecretpasswordTransform the password to a hash, with the aid of restarting the CouchDB carrier:
sudo systemctl restart couchdbUse the same format to feature a couple of admin money owed. You’ll need to restart the CouchDB provider after including a brand new account.
Verifying CouchDB Installation
Although To verify whether or not the set up modified into done efficaciously, difficulty the following curl command at the way to print the CouchDB database facts in JSON format:
curl http://127.0.0.1:5984/For readability the output below is formatted.
out put
{
"couchdb":"Welcome",
"version":"2.3.1",
"git_sha":"c298091a4",
"uuid":"17a6b911e0d5bfe36778b387510dbd93",
"features":[
"pluggable-storage-engines",
"scheduler"
],
"vendor":{
"name":"The Apache Software Foundation"
}
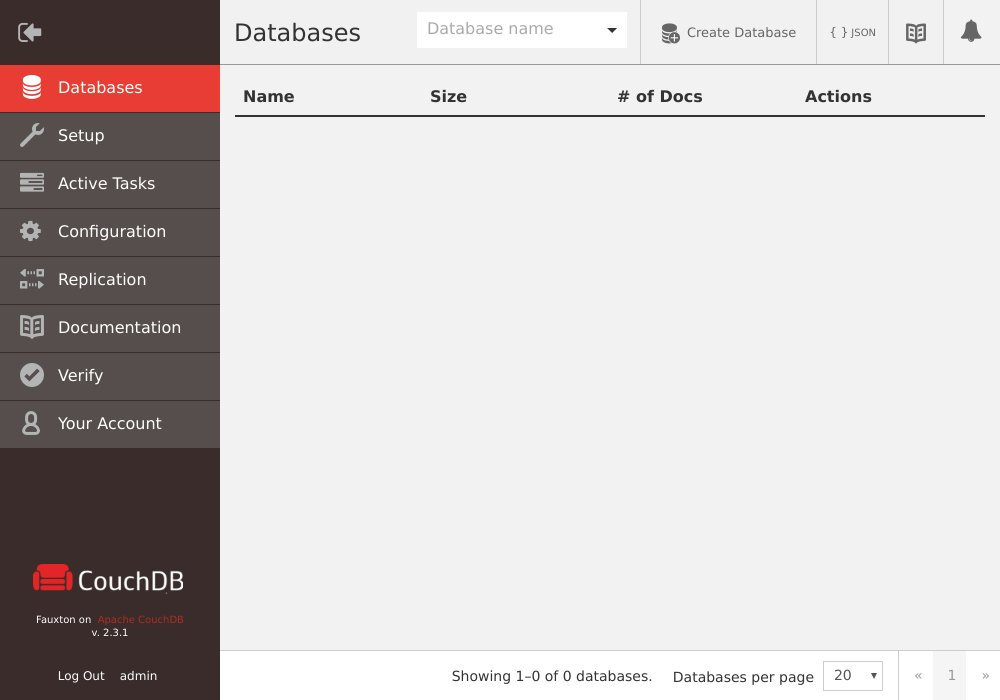
}If you prefer GUI, you can get right of entry to the CouchDB internet-based totally interface, Fauxton at:
http://127.0.0.1:5984/_utils/