Get your pen back into shape
Microsoft’s Surface Pen can add a lot of extra functionality to your Surface but this stylus isn’t without its faults and has been known to stop working on occasion.
Here are some of the best solutions to fix a Surface Pen that’s not working so you can get back to writing, drawing, and multitasking on your Windows 10 computer.
Download the Latest Windows 10 Update
If your Surface Pro’s Pen is not working properly, or at all, it may be because you haven’t installed the latest Windows update on your Surface Pro, Go, Book, or Laptop. Performing a Windows update on your Surface will not only download the latest Windows 10 operating system update, but it will also update and fix your device drivers used to make devices like the Surface Pen run properly.
- To check for the latest Windows 10 update and any new drivers, swipe in from the right side of the screen with your finger to open the Action Center.
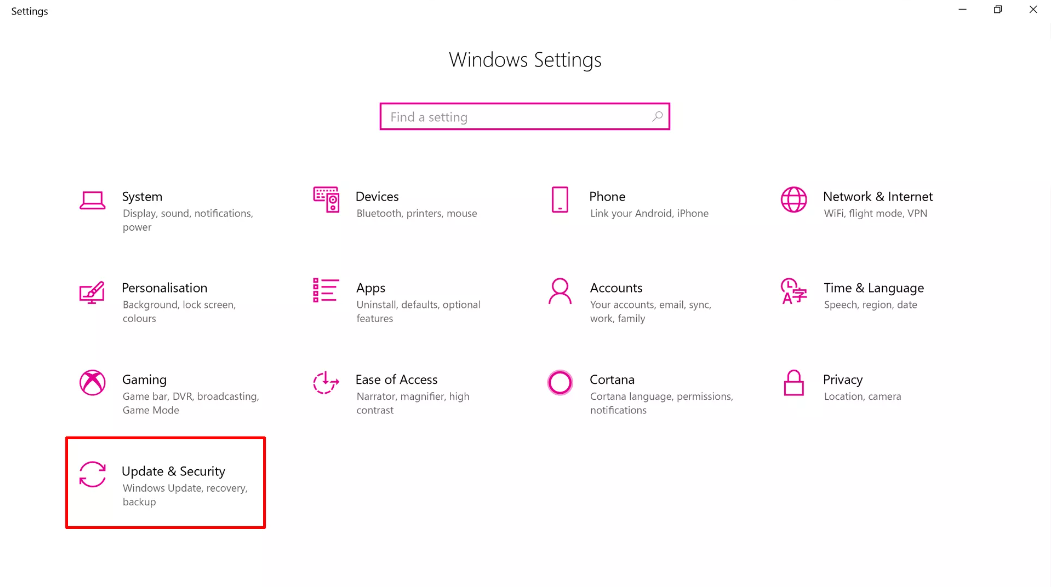
- Tap All settings.
- Tap Update & Security.

4. In the middle of the screen, tap the grey Check for updates button. Your Surface will now automatically download any available updates and drivers from Microsoft’s servers.
5. That’s it.
Check the Surface Pen’s Battery
All Surface Pens are powered by an AAAA battery and a flat battery could very well be the reason for why your Surface Pen is not working.
- To check the battery in your Surface Pen, press and hold the eraser button on the end of the stylus for five to seven seconds. A small LED light should turn on. A green light means the battery still has a charge, while a red light means it’s almost flat and should be replaced. No light means the battery is already dead.
- To replace the battery, open your Surface Pen by firmly twisting, then pulling the eraser end of the stylus. Once the stylus has been opened, the battery can be swapped out for a new one.
Pair Your Surface Pen to Your Surface Pro
If your Surface Pen’s LED light turns on but it’s still not writing when you touch it to your Surface’s screen, you may need to pair it via Bluetooth.
- Open the Windows 10 Action Center on your Surface Pro, Go, Laptop, or Book by swiping in from the right side of the screen with your finger.
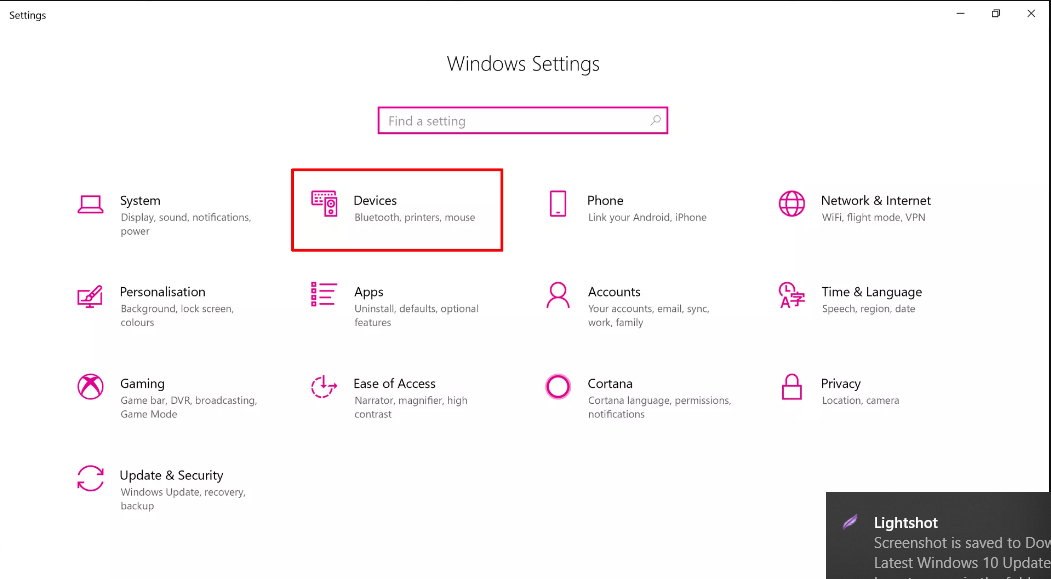
- Tap All settings.
- Tap Device.

4. If you see Surface Pen in your list of paired devices, tap it, then tap Remove device. Removing it and pairing it again should hopefully fix any connection errors you’re experiencing. If you don’t see your Surface Pen on the list, proceed to the next step.
5. Tap the grey Plus (+) button next to Add Bluetooth or other device.
6. A new window will pop up. Tap Bluetooth.
7. Tap Surface Pen to pair it. The pairing process should only take a few seconds.
Are You Using the Correct Program or App?
After watching commercials for the Surface Pen and Surface range of devices, it can be easy to mistakenly believe Microsoft’s stylus can draw on any app at any time in Windows 10. Unfortunately, this isn’t the case. While you may think your Surface Pen is broken, you could simply be using the incorrect app.

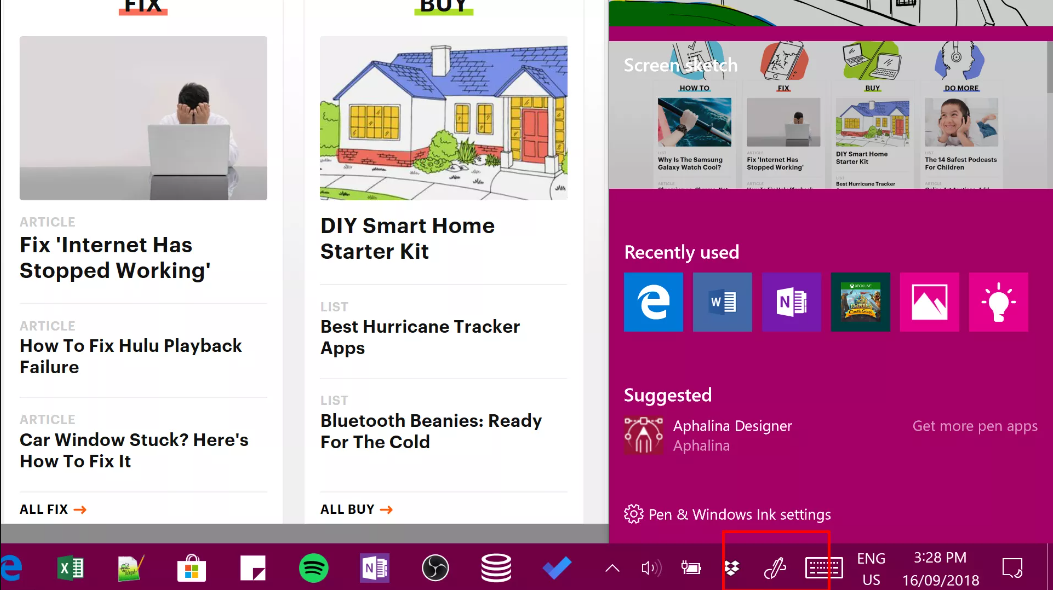
The easiest way to test the Surface Pen is to open the Windows Ink Workspace by tapping the pen icon in the lower-right of the Windows 10 Taskbar, near the clock. Once open, select Screen sketch and try drawing on the screen with your Surface Pen.
Surface Pen Still Not Working?
If your Surface Pen still isn’t working properly, it may have been damaged and is in need of replacement. If this is the case, reach out to Microsoft Support either in person at a Microsoft Store or via their online support page.


