
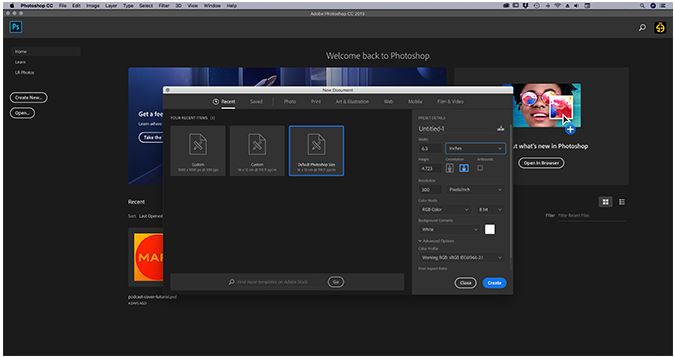
Create a Custom Gradient Using Photoshop CC Photoshop CC is a tremendous tool for developing gradients. By virtually blending two colorations together, you could upload some visible “pop” to your photographs. Photoshop has a few built-in options for this, however what in case you want to create a gradient from scratch?
In this newsletter, we’ll walk you via the way to create a custom gradient the use of Photoshop CC in four simple steps.
Create a Custom Gradient Using Photoshop CC Step 1: Set Up Your Canvas
Create a Custom Gradient Using Photoshop CC First, open Photoshop CC. For this tutorial you don’t need a custom template, so we can go with Photoshop’s default canvas size.
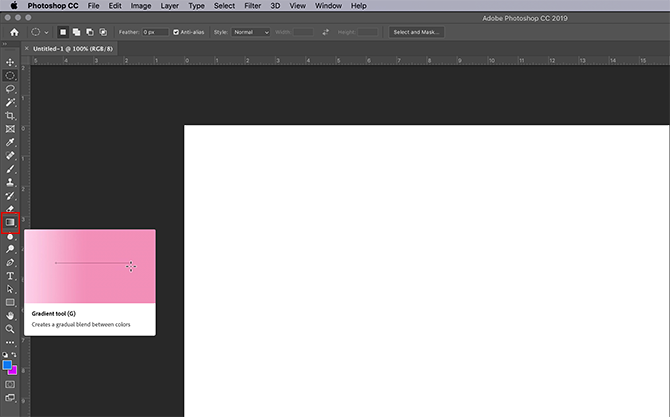
Create a Custom Gradient Using Photoshop CC Once you’ve opened your canvas, ensure your Gradient device is active, visible right here highlighted in crimson. After it’s active, choose colorations you want on your gradient, the use of your color swatches at the lowest of the toolbar. For this academic we’re going to go along with a vivid blue and crimson, to create a “neon” look.
Create a Custom Gradient Using Photoshop CC Step 2: Using the Gradient Editor
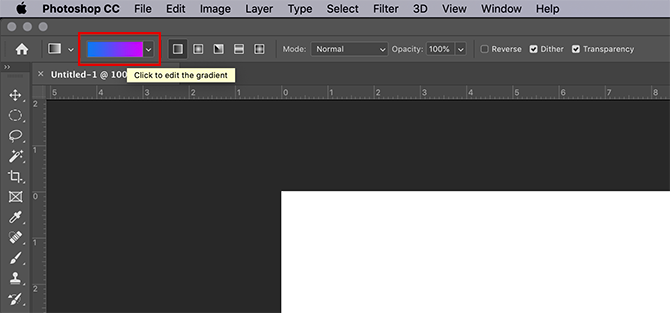
Create a Custom Gradient Using Photoshop CC To customize your gradient, go to the pinnacle left-hand nook of your workspace and double-click at the colour bar to get right of entry to your Gradient Editor. The Gradient Editor is a effective, simple device and a one-forestall shop for all your customization wishes.
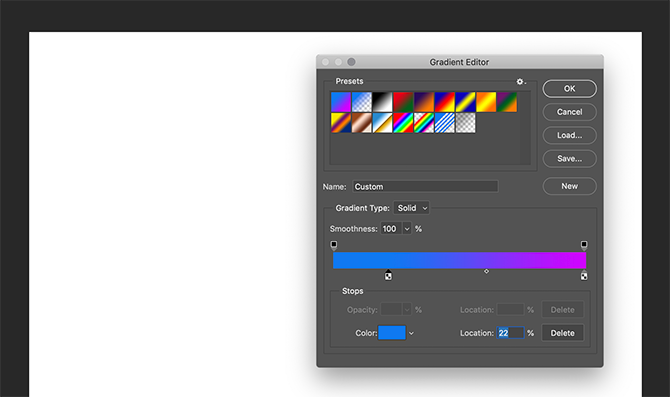
Create a Custom Gradient Using Photoshop CC At the pinnacle of the editor you’ll see a row of Presets that include Photoshop CC. Along the right facet of the editor are alternatives to Load, Save, and create New gradients. At the lowest of the editor are the equipment to customize your gradient.
There are two different forms of gradients you may create. The first one we’re going to layout is known as a Solid gradient. You can see this selection inside the dropdown menu wherein it says Gradient Type: Solid in the middle of the editor. Make sure this selection is chosen before you begin.
Create a Custom Gradient Using Photoshop CC Step 3: Create a Solid Gradient
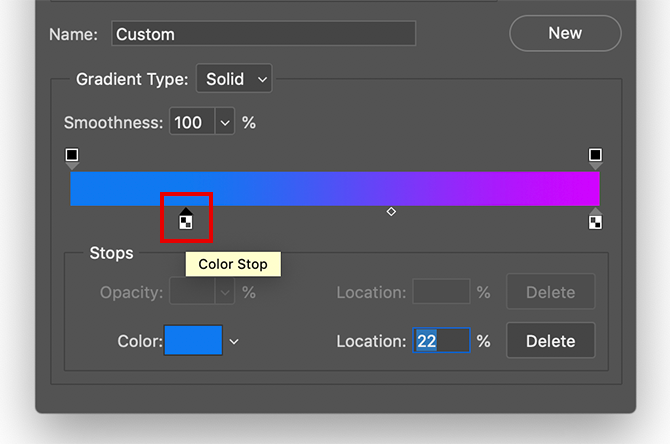
Photoshop’s default gradient transitions among colorations, however what in case you need to transition among 3? To do this, click on on one of the Color Stops positioned on the left and right ends of the coloration slider. For this educational we’re going to alter the left Color Stop by means of dragging it toward the center of the bar. Where it sits is the spot that my 0.33 colour will mixture into the others.
To select a 3rd colour, double-click at the Color Stop. It will open up your Color Picker and permit you to select a hue of your choice. Once decided on, click on OK. Photoshop will add the 1/3 colour for your slider.
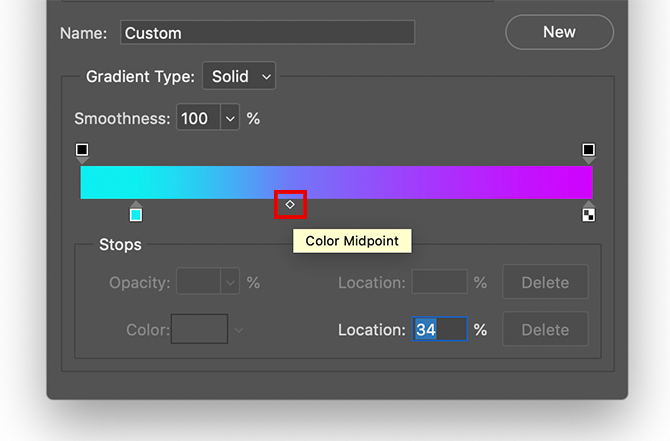
These colors are searching exact, however what in case you want to regulate where they combo at the web page, in preference to a good three-manner cut up? To do that, click and drag your Color Midpoint throughout the slider, to change your ratios.
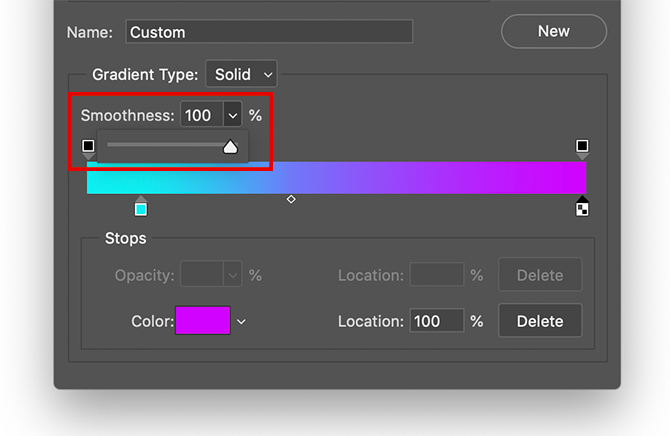
You also can alter the Smoothness of how you combo those shades collectively. For this educational I’m going to hold the smoothness to one hundred percent, however if you want a “choppier” appearance pull that slider to a smaller percent.
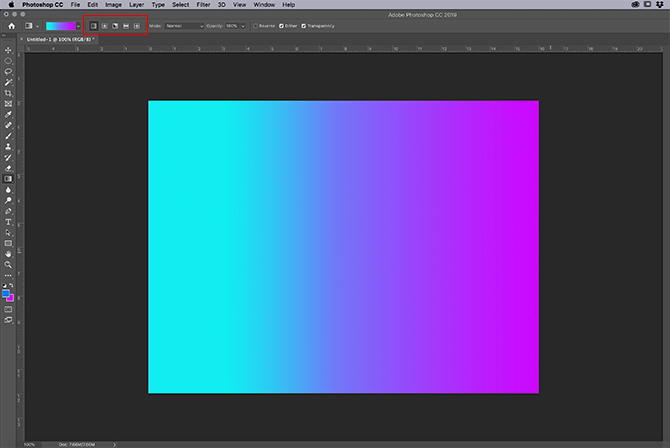
Next, click OK to exit the Gradient Editor. Then go to your gradient fashion buttons, discovered within the pinnacle left-hand corner of your workspace subsequent in your color bar. There are 5 extraordinary styles you may use, however all of them work inside the same manner.
To follow them to your image, click at the gradient form of your desire, then click and drag throughout your page. When you launch, Photoshop will practice the gradient inside the route you’ve indicated. We’ve talked about this method before in our observe how to create a podcast cover the usage of Photoshop.
Try Out the Different Types of Gradient
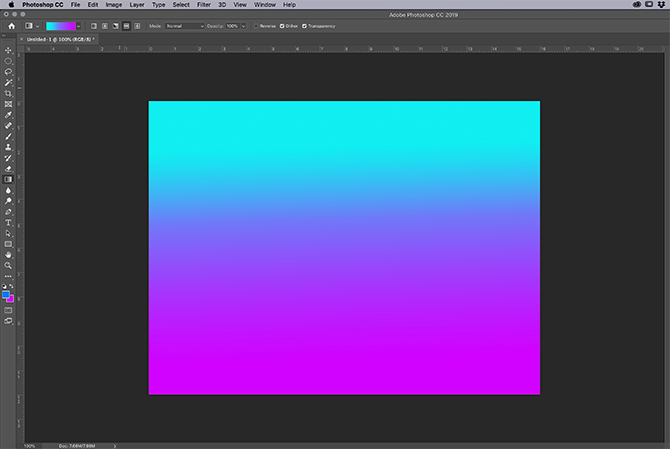
The first type of gradient we’re going to try is the Linear Gradient, which looks pretty standard.
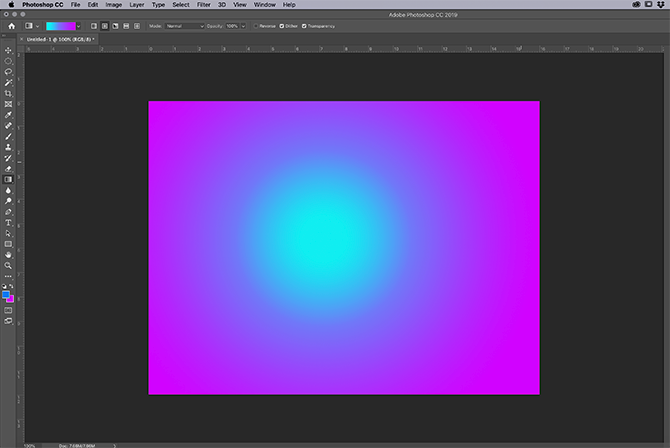
You also can attempt a Radial Gradient, which looks as if the glow from a spotlight. I for my part use this kind of a gradient to create the “glow” that you see round a celebrity in space.
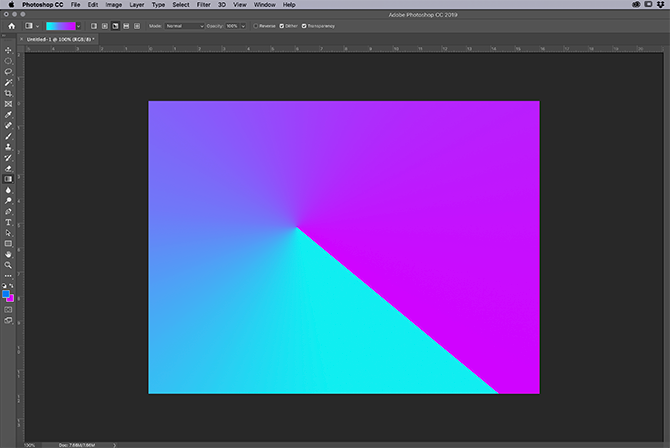
If you want a difficult edge of mild, the Angle Gradient is a clearly top choice.
Reflective Gradients are good for liquid surfaces and sunsets.
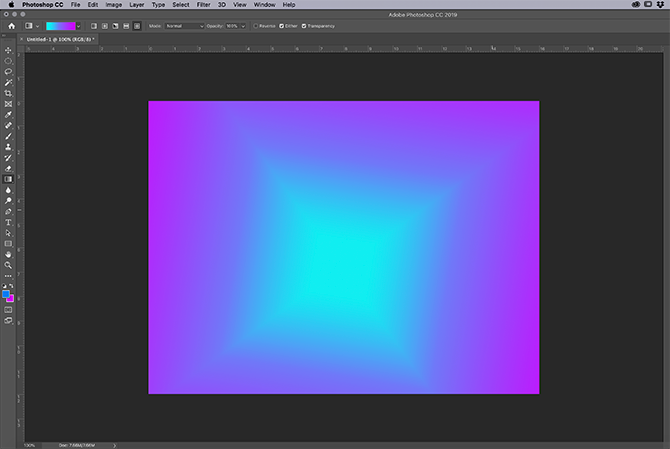
Diamond Gradients are type of funky, but they can be used as a highlight glare or the reflective edge on a gemstone.
This is all you have to do to create a custom designed, stable gradient in Photoshop. It’s each noticeably easy and easy to take into account. Before we wrap up this tutorial, but, there’s one more gradient you may create. It’s referred to as a Noise gradient and we’re going to in short contact on it.
Step 4: Create a Noise Gradient
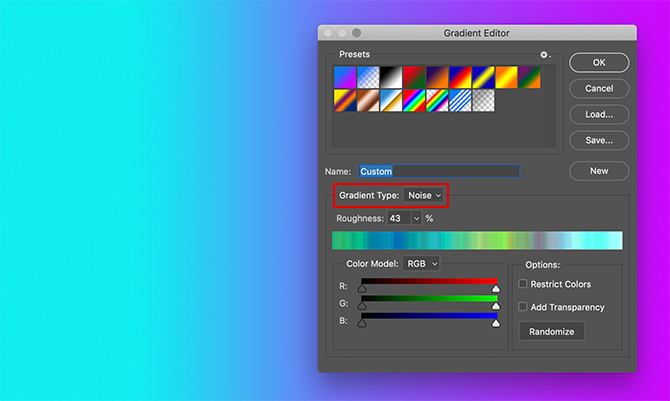
To create a Noise gradient, double-click to your color bar to get admission to your Gradient Editor. Next to Gradient Type, click the dropdown menu to choose Noise. You’ll straight away see a new colour slider show up on the lowest of your editor, in conjunction with sections to alter Roughness and Color Model.
Beneath Color Model are three sliders for the character coloration channels. By sliding the markers alongside each channel, you could alter what number of colorings display up for your gradient, what colour they are, and the brightness.
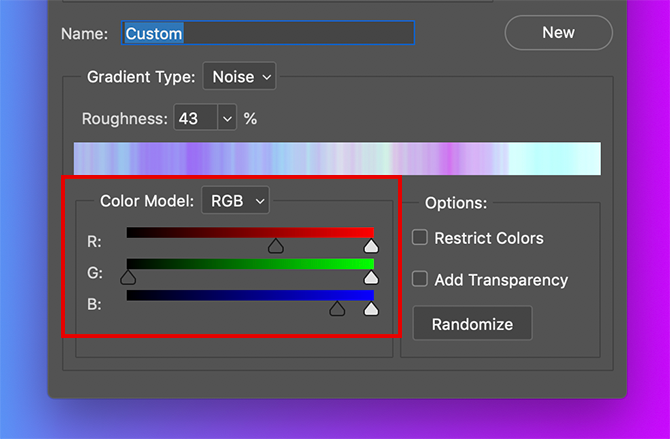
You can also alter the assessment between these colours via using Roughness. A high percentage of roughness manner that the gradient can have very wonderful traces of colour. A low percent manner that the colours could be mixed.

Once these specs are calibrated, click OK to exit the Gradient Editor. Choose your gradient style in the left-hand corner of your workspace, then click and drag your gradient tool across your canvas to check out the different results.
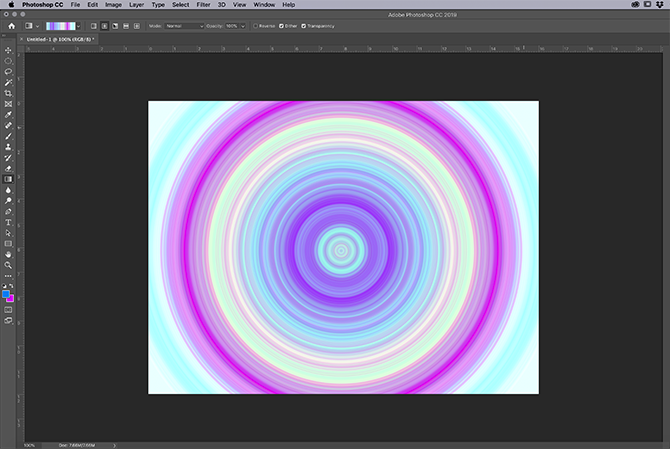
You’ll immediately notice that noise gradients look very different from solid ones. The Radial Gradient is a good example of this.
How to Save Your Gradient as a Preset
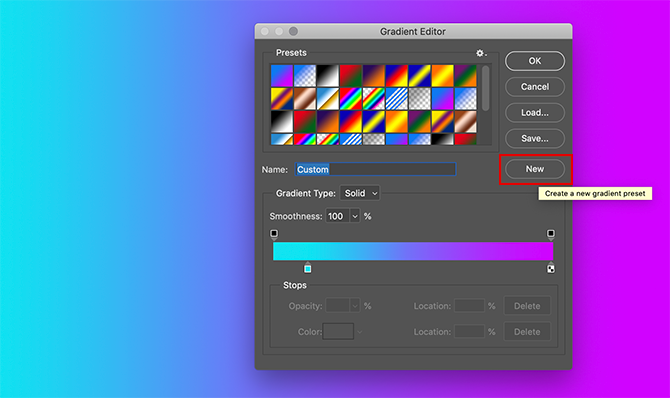
Let’s say you really like the gradient you created and you want to use it again on another image. To do this, go to Gradient Editor > New. This will add a new swatch to the gradient you created in the Presets window.
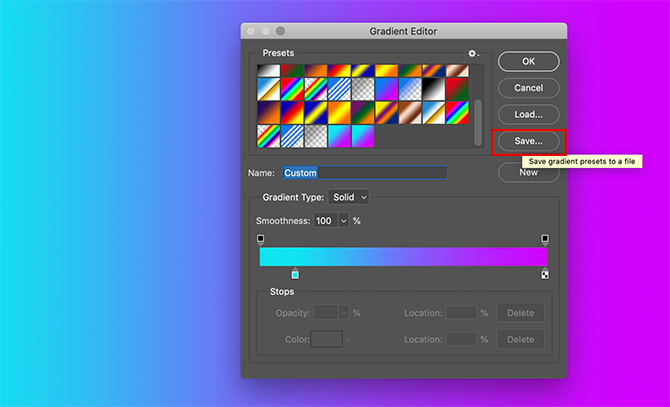
After you create your swatch, click Save. Give your new gradient a meaningful name, then click on Save again.
Now that your preset is saved, how do you access it for other projects? Make sure your Gradient tool is active, then click on the color bar to access the Presets window. After that, click on the “gear” icon, seen here in red.
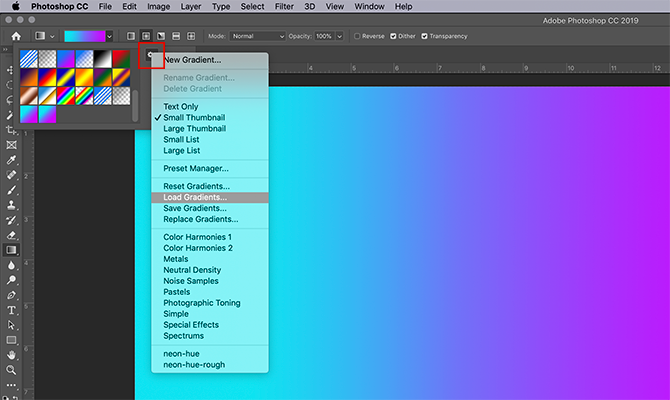
Next, click Load Gradients. This will bring up your list of gradients, where you can select your custom swatch. Once selected, click OK.