
Discover the Power of an Engaging Introduction: Unlock the Secrets to Captivating Readers!
Josie was a budding computer programmer who had just been introduced to the world of APIs. She was determined to learn how to use them, and her friend suggested she make a Twitter bot to practice. Josie was excited by the idea and quickly set to work. She followed the tutorial her friend sent her and soon she had her own Twitter bot up and running. It was only a few lines of code, but Josie was proud of the work she had done. The bot was programmed to randomly tweet out a link to a video game soundtrack once a week. She also programmed it to respond to any Twitter user who asked for a link with a random link from the same array.
Josie was eager to show off her new creation and set up a Github repository for the bot’s code. She also learned how to host her bot on a Linode cloud instance. Soon after, Josie’s bot started to gain a following. People were impressed with Josie’s work and they started to retweet her bot’s tweets. Josie was thrilled by the response and it made her even more determined to learn more about APIs and coding. So far, the Twitter bot has been a great success for Josie. She continues to learn about coding and APIs and her Twitter bot continues to tweet out links to video game soundtracks. Who knows what she’ll be able to create with her coding skills next?
Unlock the Secrets to a Successful Start: A Guide to Preparing Before You Begin!
- If you already have a Twitter account, you can easily use it to access the Twitter Developer portal; alternatively, you may want to create a new, separate Twitter account specifically for this tutorial. Either way, Twitter requires a unique email address and phone number to register the account.
Deciding on the name and purpose of a Twitter account is easy; first, choose a unique account name, then the bot will be automatically assigned the name @SNESSoundtracks. After that, you’re all set!
- Using conjunct adverbs, this tutorial demonstrates how to store the bot’s application code in a repository on GitHub. If you possess a GitHub account, you can use that one; otherwise, you should create a new one now.
- At the end of this tutorial, your Node.js app will be installed and running on a Linode instance, whether you already have an account or not. If you already have an account, you can use it, otherwise, you can create a new one now and take advantage of a free credit by clicking on the Sign Up link at the bottom of this tutorial.
Unlock the Power of Your Workstation – Install the Right Software Now!
- VS Code is a recommended plain-text editor, offering a built-in terminal, however any other plain-text editor can be utilized too; thus, providing an ideal solution for users seeking an efficient and reliable desktop text editor.
- Git is a distributed version control system widely used for software development. It can be used through the command line software, or through the GitHub Desktop GUI. Both approaches offer a range of powerful features, allowing developers to collaborate efficiently and effectively on projects.
- Unlock the Power of Node.js and npm to Create Your Own Twitter Bot!
Get Started Quickly with Node.js and npm: Install with Node Version Manager!
- Take Control of Your Node Versions – Follow Our Step-by-Step Guide to Installing and Configuring NVM!
- Easily Install the Latest Version of Node.js and npm with One Command!
nvm install --lts- Unlock the Power of nvm-windows – Follow the Step-by-Step Installation Guide
- Stay Updated with the Latest Versions of Node.js and npm – Run This Command From Your Terminal Now!
nvm install latestUnlock the Power of Twitter Development with Access to the Twitter Developer Portal!
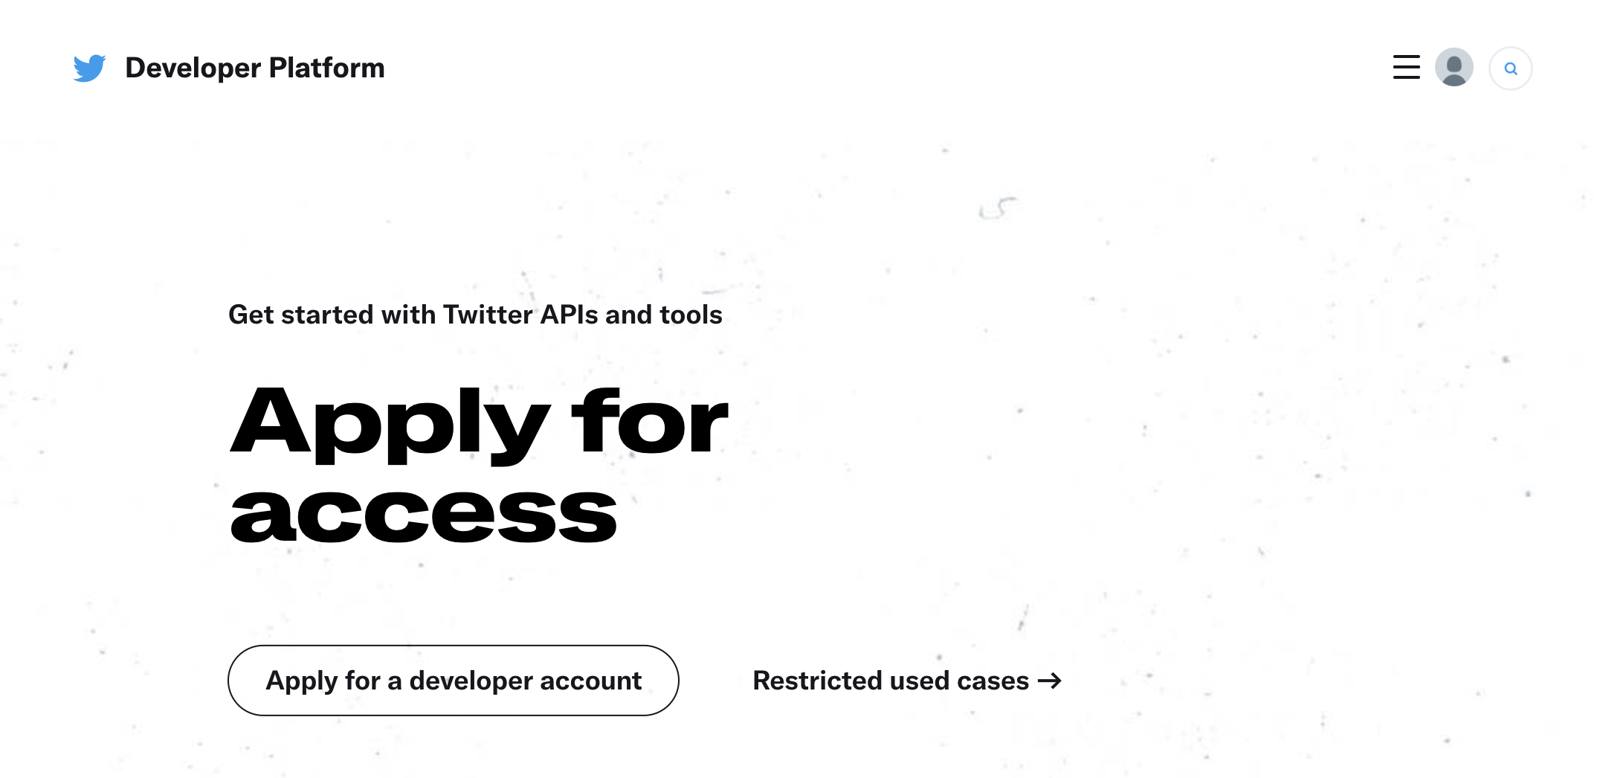
- Apply Now: Unlock the Power of Developer Resources on the Top Right of Your Profile Picture!
- Click Here to Start Your Developer Journey: Apply for a Developer Account Now!
- Sign In Now and Unlock the Power of Twitter!
- Unlock the Power of Twitter For Your Project With the Hobbyist & Bot Developer Account!

- To complete the Basic Info, Intended Use, Review, and Terms screens, the following answers were provided for the prompts: Basic Info: the name of the application; Intended Use: for monitoring employee attendance; Review: the application must be secure and easy to use; Terms: the application must be compliant with all relevant laws. All of these answers are essential for the successful functioning of the application, ensuring its secure and compliant usage for monitoring employee attendance.
-
- Coding Hobbyist Seeking Twitter Developer Access to Learn, Practice and Create a Bot!
- Don’t Miss Out – Analyzing Twitter Data Can Unlock Valuable Insights!
- Bring the Video Game Experience to Twitter: Introducing a Bot that Responds to @Mentions and Tweets Out Links to Soundtracks!
- No Need for Twitter: How You Can Avoid Displaying or Aggregating Data from Twitter Content Outside of Twitter
- No: Your Product, Service, or Analysis Will Not Make Twitter Content or Derived Information Available to a Government Entity
- Although there is no need for giving information to the government or consuming streaming data for analytical purposes, the application process still needs to be followed. Therefore, it is important to carefully follow the instructions on screen until you have an authenticated developer account. Consequently, the application should be more straightforward.
Create and Clone a GitHub Repository – Unlock the Power of Open Source Collaboration!
- Visit GitHub.com and then follow the Create a repository section in GitHub’s official Create a repo document. When creating the repository, make sure to select the repository name, description and visibility accordingly. Additionally, select the Initialize this repository with a README and add a .gitignore and license if appropriate. Finally, click the Create repository button to complete the setup.
-
- You can name the repository however you want, but for the sake of tutorial examples, it is best to name it “snes-soundtracks.”
- The repository can either be public or private; however, if it is private and you wish to use Git command line tools, then you must authenticate with GitHub in your terminal, which requires additional steps. For a simpler experience, it is therefore recommended to make the repository public.
- Easily Access Your Project Information: Enable the README File Toggle!
- Unlock the Power of Open Source with the MIT License: Get Helpful Recommendations from Choosealicense.com Now!
- Unlock the Full Power of Your Project: Enable the .gitignore Toggle and Choose Node!
- Download Your New Repository Instantly – Learn How to Easily Create & Access it from Your Browser!
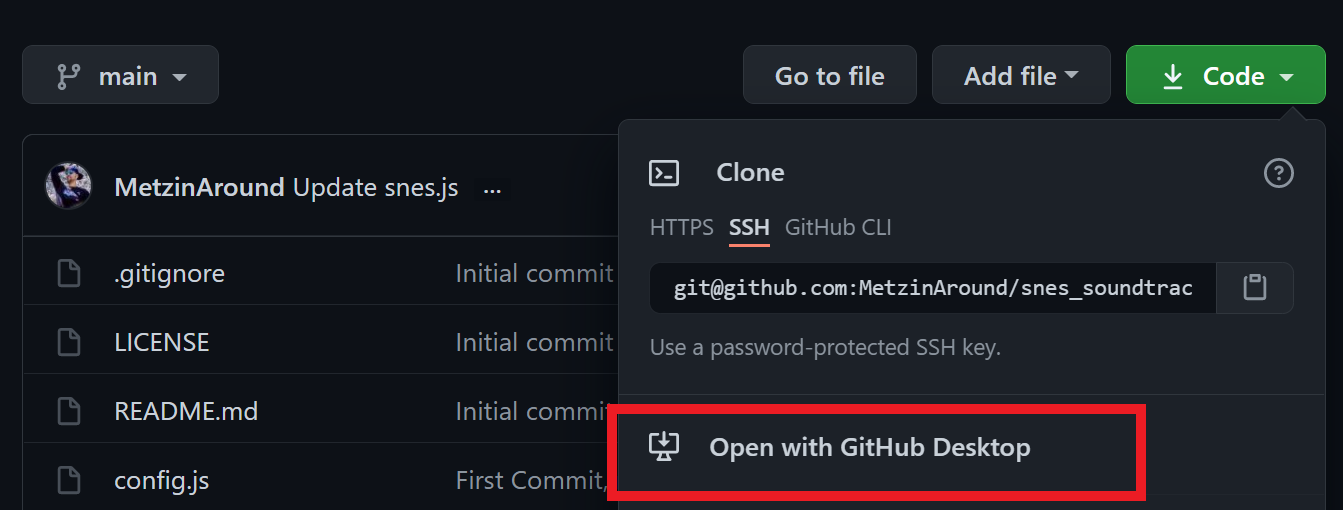
- Discover How to Easily Clone a Repository from GitHub to GitHub Desktop with This Detailed Guide & Example Screenshot!
- Unlock the Power of the Command Line – Learn How to Clone with the Git Clone Command!
git clone https://github.com/your-github-username/snes-soundtracks.gitUnlock the Power of Twitter: Create Your Own App in the Twitter Developer Portal!
After registering your developer account, you can create an app within the developer portal; once created, Twitter will generate a set of keys for your Node.js project to authenticate with the service. Accordingly, this section outlines both how to create your Twitter app and where to store the keys.
Eliminate Repository Chaos: Create a .env File to Keep your Code Organized!
consumer_key=
consumer_secret=
access_token=
access_token_secret=
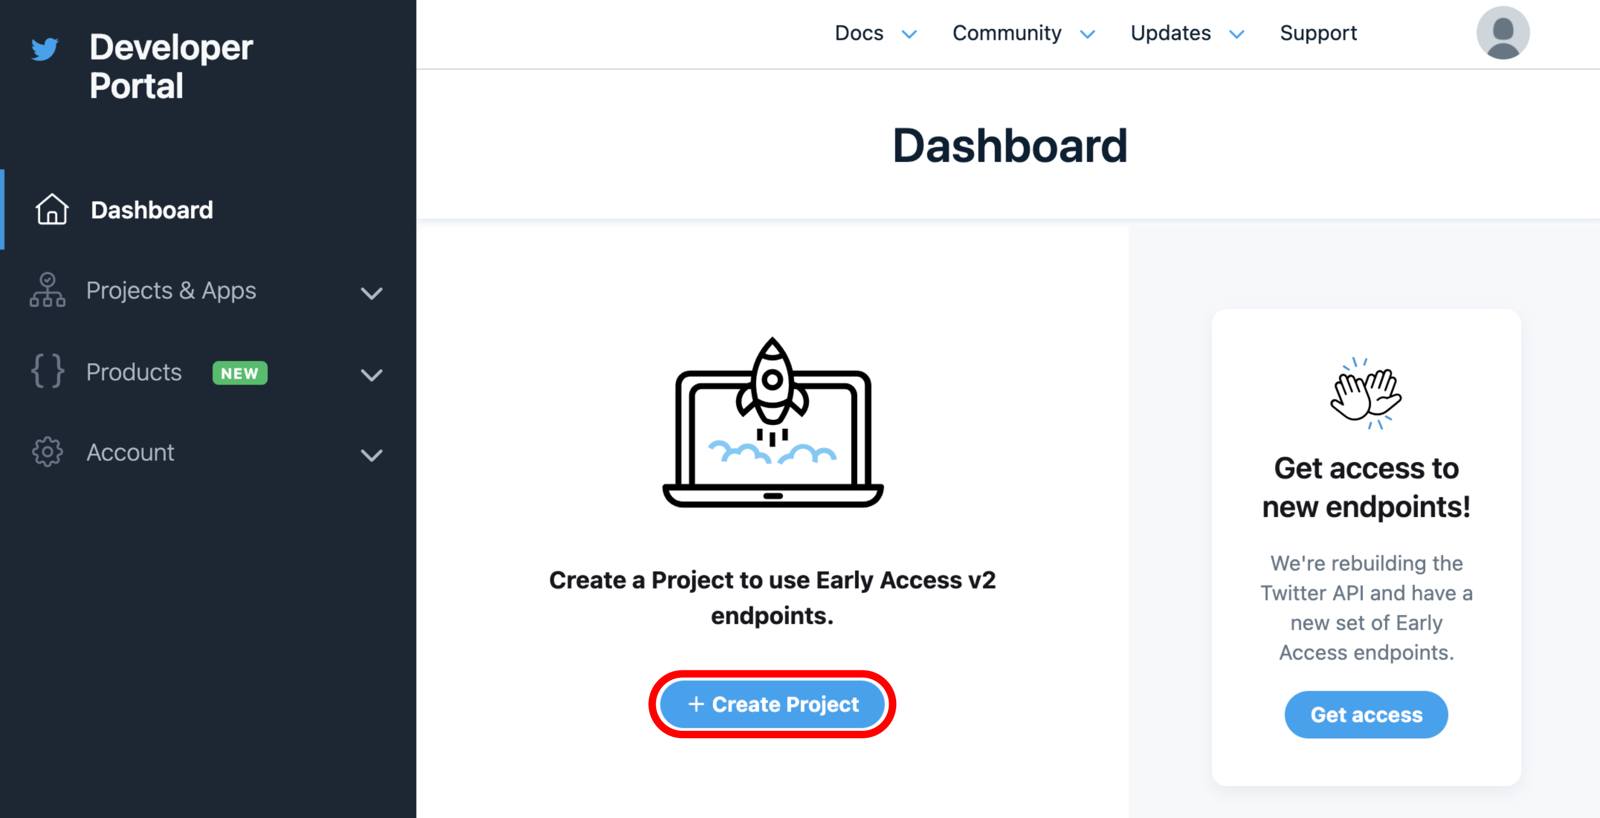
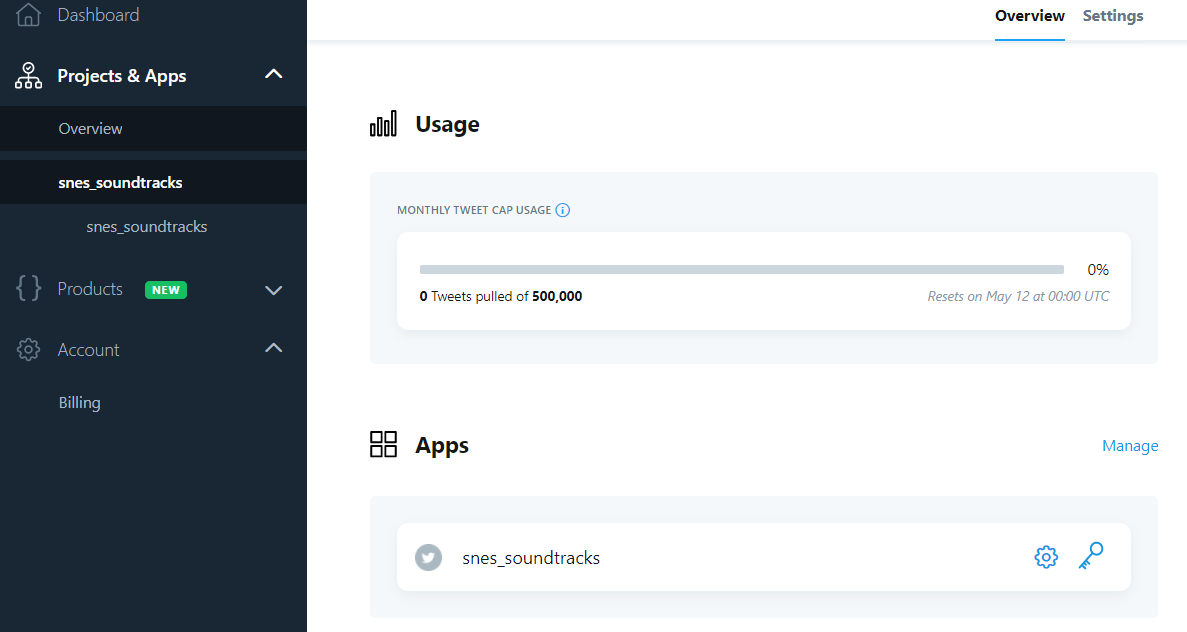
- Rediscover the Power of Twitter Development: Return to the Portal Dashboard Now!
- Unlock Your Creative Potential: Click the Create Project Button Now!
- Unlock Your Potential – Complete the Forms that Appear Now
-
- Unlock Your Creativity: Create a Uniquely Memorable Project Name Now
- Bringing Video Game Music to Life: Introducing the @mention Bot – Automatically Tweeting YouTube Links to Your Favorite Video Game Soundtracks!
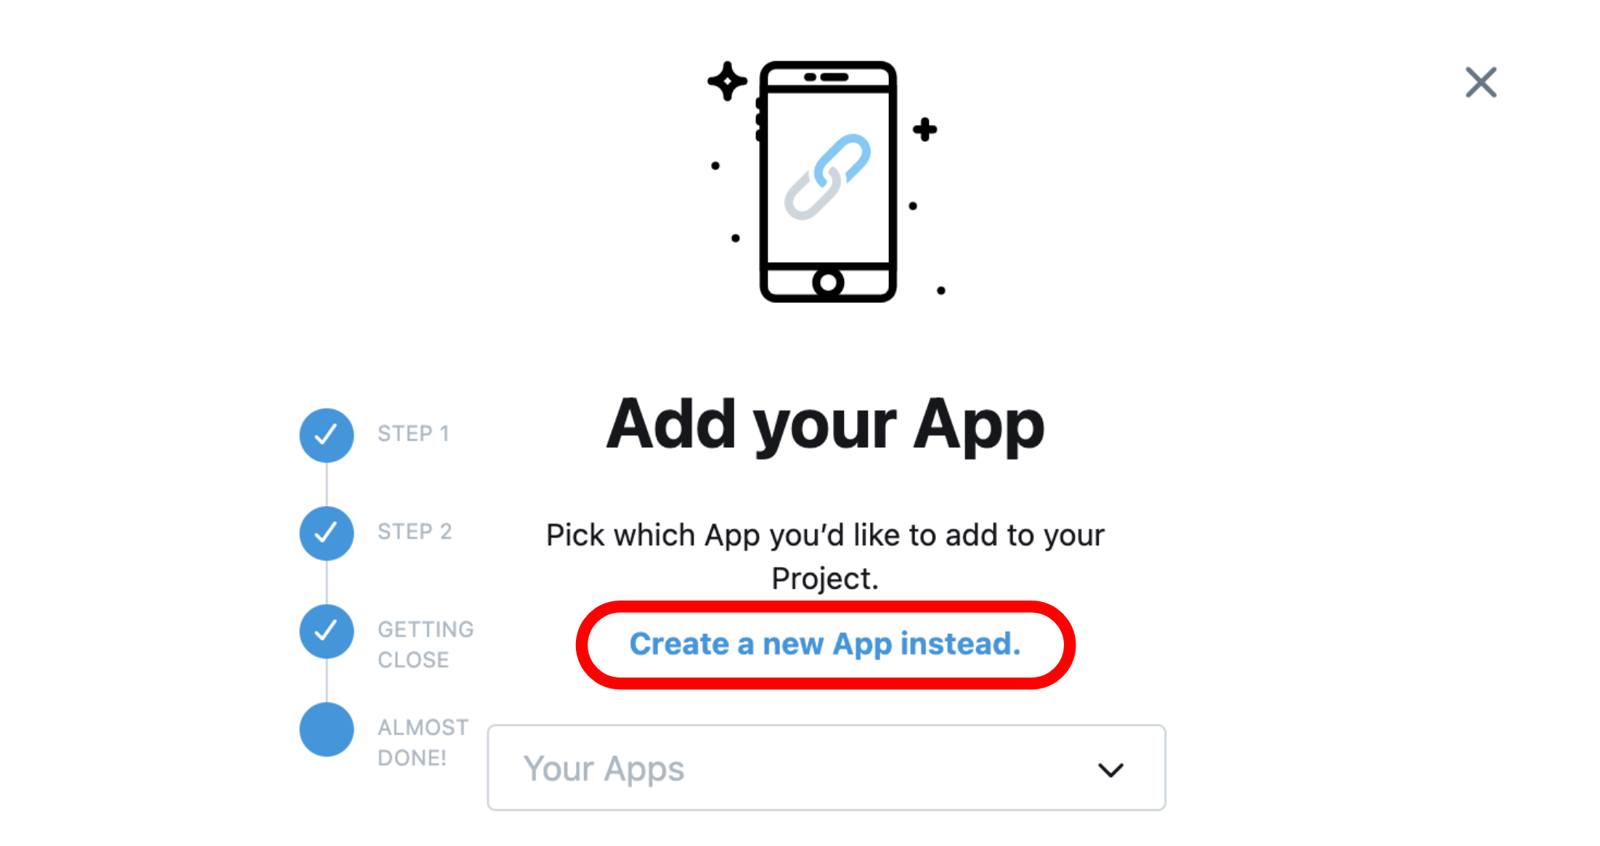
- Unlock Your Potential: Learn How to Create Your Own Bot!
- Unlock a World of Possibilities: Add Your App to the New Project!
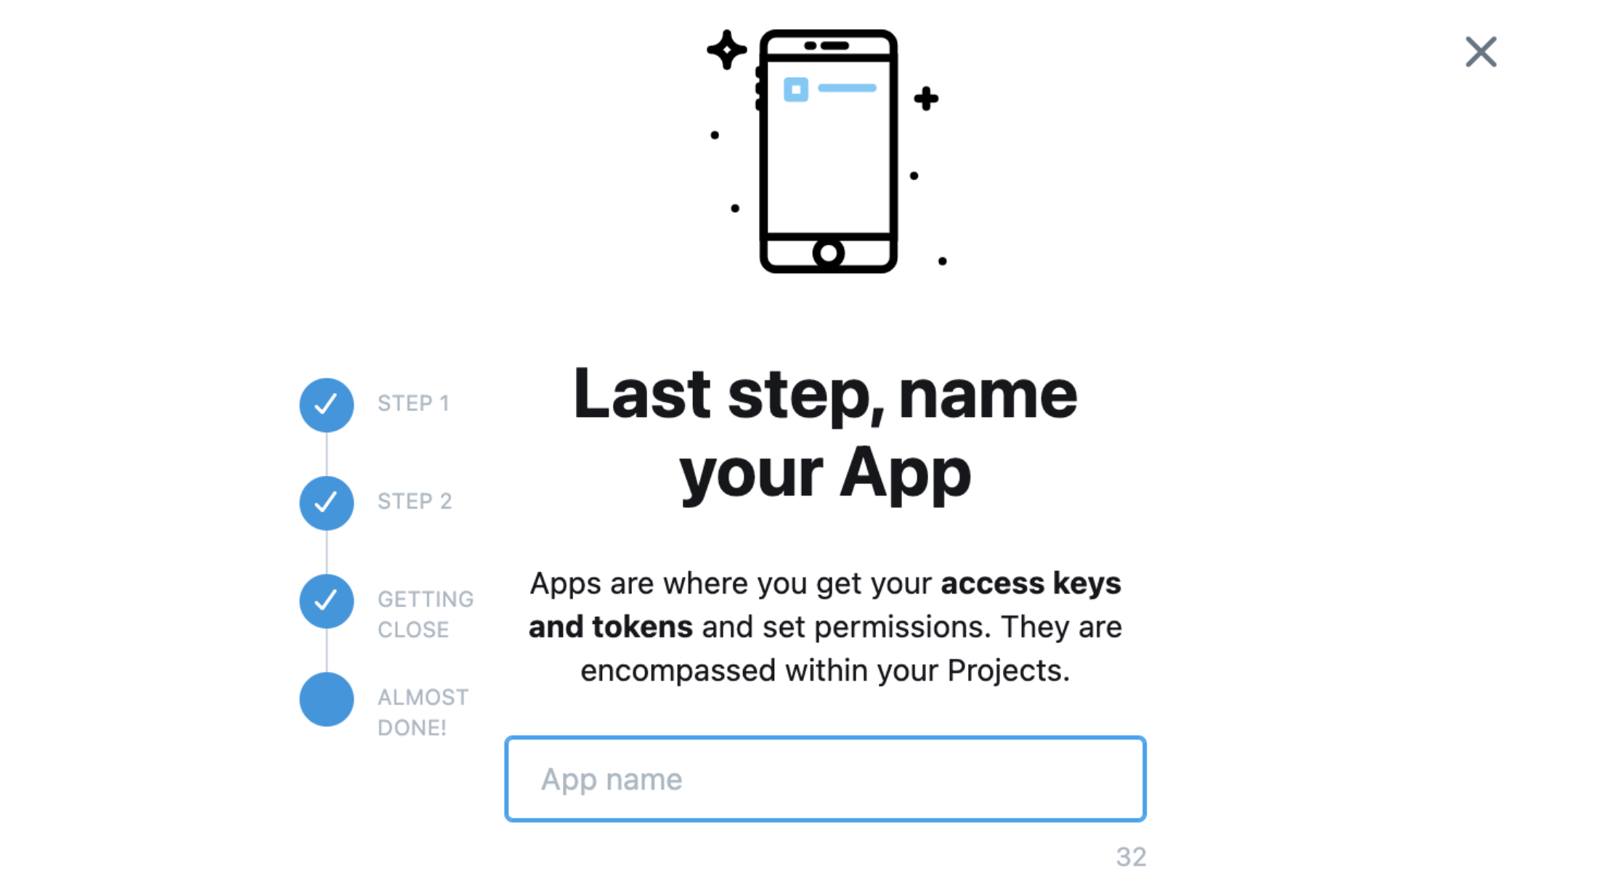
- Unlock the Secrets of Success: A Page of Hidden Keys is Revealed After Completing the Forms!
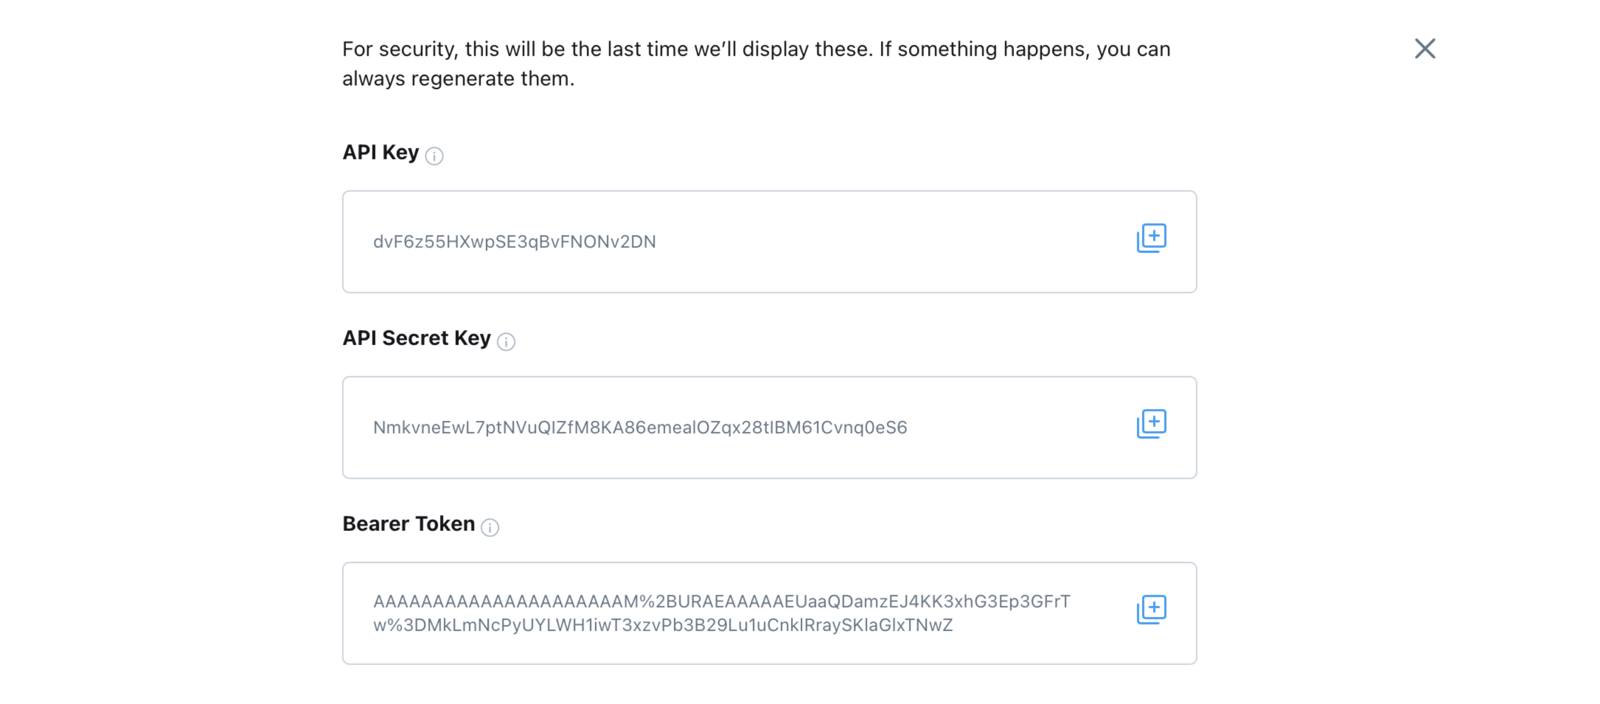
- Secure Your Application with These Easy Steps: Copy & Paste the Keys into Your .env File!
-
- The user needs to copy their API Key and paste it at the end of the consumer_key= line, without adding any extra spaces or quotes. For example, if their API Key is dvF6z55HXwpSE3qBVFNONV2DN, the line should be written as consumer_key=dvF6z55HXwpSE3qBVFNONV2DN – no more, no less.
- Copy the API Secret Key and paste it at the end of the consumer_secret line – ensuring that no extra spaces or quotes are added. Additionally, take care to ensure that the key is copied exactly as provided.
- Secure Your Developer Portal: Close the Dialog that Displays Secret Keys
Unlock the Power of Social Media: Give Your Twitter App Read and Write Permissions
- Navigate to the app in the Twitter developer portal: it is listed under the project in the sidebar navigation. Moreover, it is not the project itself, it is the app.
- By clicking on the “Edit” button in the App permissions section, users can switch their app to Read Only mode, allowing them to view content without making any changes.
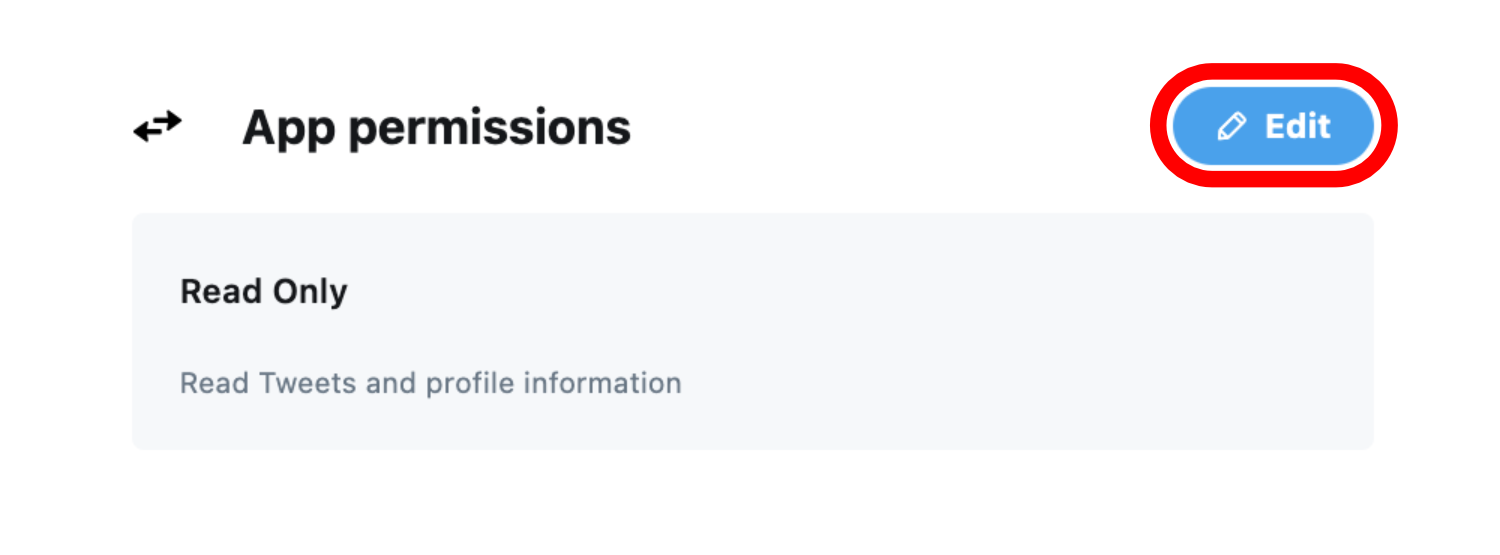
- How to Easily Read and Write Data: Unlock the Power of Read and Write with Just One Click
- Unlock the Keys to Unlocking Your Potential: Navigate to the Keys and Tokens Tab Now
- Generate Your Access Token and Secret – Unlock the Power of API Access
- Unlock Your Hidden Powers! Copy and Paste These Secret Keys into Your .env File Now
-
- Copy the Access Token and paste it at the end of the access_token= line in your .env file, precisely and without any extra spaces or quotes; otherwise, it won’t work.
- Copy the Access Token Secret and paste it at the end of the access_token_secret= line in your .env file, with no extra spaces or quotes: precisely, copy the token and paste it, ensuring there are no extra spaces or quotes.
- “Dismiss the dialog” – Conclusively, this statement indicates that the conversation should be brought to an end.
Get Started Quickly – Initialize a Node Project and Install NPM Dependencies Instantly
Right now, your local repository contains four files: your .env secrets, a .gitignore, a README.md, and a LICENSE file; however, it does not have any Node.js project files yet. To initialize your Node.js project, simply add the necessary files and start coding accordingly.
- Unlock the Hidden Power of your Terminal: Navigate to Your Local Code Repository
cd snes-soundtracks- Unlock the Power of Node.js with npm’s init Command
npm init -yExperience the Power of “The Following Output Appears”
npm init -y
Wrote to /home/username/snes-soundtracks/package.json:

{
"name": "snes-soundtracks",
"version": "1.0.0",
"description": "",
"main": "index.js",
"scripts": {
"test": "echo \"Error: no test specified\" && exit 1"
},
"repository": {
"type": "git",
"url": "git+https://github.com/username/snes-soundtracks.git"
},
"keywords": [],
"author": "",
"license": "ISC",
"bugs": {
"url": "https://github.com/username/snes-soundtracks/issues"
},
"homepage": "https://github.com/username/snes-soundtracks#readme"
}
This output displays the details of a new package.json file, which was created with the npm init command. The package.json file is used to store metadata information about the Node.js project. For further details, please refer to the ‘What is the file package.json’ article in the official Node.js documentation, as well as the ‘package.json reference’ in the npm documentation.
In order to ensure that your bot’s application code runs smoothly, it is necessary to install a few dependencies from npm. To do this, simply enter the relevant commands in your terminal while within the code repository; this will ensure that all dependencies are properly installed.
npm install node
npm install node-schedule
npm install twit
npm install dotenv
All You Need to Create a Fully-Functional Twitter Bot: Discover These Dependencies!
- Installing the node package provides a local Node.js binary inside your project folder, which makes your project more portable and independent of the system-wide version of Node.js. This ensures that the project can be easily installed on other systems, even if they run different versions of Node.js. Consequently, this creates a better user experience, as it eliminates the need to install the same project multiple times on different systems.
- Node-schedule is a package used by the tutorial to periodically schedule new Tweets; thus, it enables users to automate their Tweets and post updates at regular intervals. This is a convenient way to keep followers informed and engaged, as well as to ensure content distribution is regularly maintained.
- Dotenv is a package that is used to successfully read secrets that have been stored in a .env file. Specifically, it enables applications to utilize variables stored in an environment file, allowing developers to keep sensitive information secure and out of their codebase. Consequently, it is a highly effective way to store and access confidential information.
- This is a Twitter API client for Node.js, providing an easy way to access and interact with the Twitter API simultaneously. Additionally, it enables developers to write their own custom API calls, thereby allowing for a more tailored approach.
Your Directory has Never Looked Better: See What It Now Looks Like!
ls -a. .env .gitignore README.md package-lock.json
.. .git LICENSE node_modules package.json
Effortlessly Keep Your Packages Up-to-Date with These Simple Scripts
Before we can begin adding our code, we should first adjust a few parts of the package.json file in the new Node.js project; not only to ensure that the project is configured properly, but also to ensure that it is running the correct dependencies.
- Transform Your Package.json Scripts – Follow These Steps for a Quick & Easy Setup
File: package.json
 "scripts": {
"test": "echo \"Error: no test specified\" && exit 1"
},
The “scripts” section in package.json contains commands that can be used to invoke your project; furthermore, for more information on this part of package.json, the npm documentation’s “scripts reference” should be consulted.
Transform Your Scripts Section – Modify It to Match This Snippet Now!
File: package.json
"scripts": {
"test": "snes.js",
"start": "node ./snes.js",
"develop": "NODE_ENV=develop node snes.js"
},
- Discover the Hidden Secrets Inside: Scroll to the Main Section to Uncover What Lies Beneath
File: package.json
"main": "index.js",
Get the Latest Update: Stay Ahead of the Curve with This Important Information
File: package.json
"main": "snes.js",
- In order to ensure that the changes referenced an snes.js file which doesn’t exist yet, one can create an empty placeholder file with this name in their code repository. This can be done by using the touch command from the terminal or simply creating an empty file using a text editor.
touch snes.jsAdd Your Own Twitter Bot Application Code Now – Unlock the Power of Automation
Now that your Node.js project is ready for the Twitter bot application code, you can open snes.js in your text editor and proceed through the next sections accordingly; furthermore, ensure that you understand the code and its implications.
Discover How to Unlock Hidden Secrets, Automate Tasks, and Control YouTube Videos with These Easy Tips
This snippet of code can be used to create a Twitter bot that posts random SNES soundtracks. After copying and pasting the snippet into snes.js, the @SnesSoundtracks string on line 3 needs to be replaced with the user’s own Twitter username in order for the bot to work properly. Once this is done, the bot will be ready to go, allowing the user to enjoy a variety of SNES soundtracks at random intervals.
File: snes.js
console.log("SNES Soundtracks booting up");

const twitterUsername = '@SnesSoundtracks';

//making sure npm run develop works
if (process.env.NODE_ENV === "develop") {
require("dotenv").config();
};

//rules for node-schedule
var schedule = require("node-schedule");
var rule = new schedule.RecurrenceRule();
rule.dayOfWeek = 1,
rule.hour = 10;
rule.minute = 0;
rule.tz = "Etc/GMT+4";

//array to pull soundtracks from
var soundtrackArray = [
"https://www.youtube.com/watch?v=85u34SUh05Y", // Legend of Zelda
"https://www.youtube.com/watch?v=85u34SUh05Y", // Chrono Trigger
"https://www.youtube.com/watch?v=UyNufyV3VCo", // Super Metroid
"https://www.youtube.com/watch?v=Y2VJeZDejtc", // Final Fantasy VI
"https://www.youtube.com/watch?v=wgUmFPnkoHU", // Super Mario World
"https://www.youtube.com/watch?v=-QsysJwzod4", // Super Street Fighter II
"https://www.youtube.com/watch?v=oRxgYC5zrV4", // Super Mario World 2: Yoshi's Island
"https://www.youtube.com/watch?v=rJJk9Zk2h_U", // Super Mario Kart
"https://www.youtube.com/watch?v=byIjMomjWkA", // Star Fox
"https://www.youtube.com/watch?v=wpchBo75N68", // Super Mario RPG: Legend of the Seven Stars
];
var soundtrackArrayLength = soundtrackArray.length;
Uncover the Power of Code: Reveal What It Can Do for You!
- Startup Message Successfully Logged – Run Your Code with Confidence
- Using the built-in Node.js require() function, the dotenv module is included on line 7. Furthermore, the dotenv module’s config() function is used to read the values from the .env file and place them in the process.env Node.js property. Consequently, the consumer_key secret can be accessed inside process.env.consumer_key within the code – all in one line.
The if statement on lines 6-8 ensures that the Node.js environment is set to develop, thereby preventing any unwanted behaviour. This is handled by adding the “develop”: “NODE_ENV=develop node snes.js” line in the scripts section of the package.json file; thereby allowing the user to control when the Node.js environment is set to develop.
- We utilized the node-schedule package by setting up a few variables on lines 11-15. These variables specify that the bot should tweet periodically every Monday at 10 am Eastern Daylight Savings Time. Furthermore, a RecurrenceRule was created to ensure this schedule could be followed.
- Using conjunct adverb, lines 18-30 set up an array of soundtrack links for the bot to pull from at random; thus, enabling the bot to generate a variety of different soundtracks for users to enjoy.
Unlock the Power of Twitter: Guide to Authenticating and Listening for Tweets
Supercharge Your App Development: Add snes.js to the Bottom of Your Script
File: snes.js
// ... append to bottom of file:

// Create a Twitter client object to connect to the Twitter API
var Twit = require('twit');

// Pulling keys from another file
var config = require('./config.js');
// Making a Twit object for connection to the API
var T = new Twit(config);

// Setting up a user stream
var stream = T.stream('statuses/filter', { track: twitterUsername });

// Now looking for Tweet events
// See: https://dev.Twitter.com/streaming/userstreams
stream.on('tweet', pressStart);
Take Your Code to the Next Level: Introducing Twit
- Unlock the Power of Twitter with the Twit Twitter API Client Module!
- Create a New Configuration Object in Just Two Steps – With Line 7 and a config.js File!
- The new operator of JavaScript is used in line 9 to create an instance of the Twitter API client and the configuration object from line 7 is passed to its constructor function. This instance is stored in the variable T and the T.propertyName syntax is used to access any property, field, or method from the API client’s library; thus, simplifying the usage.
- Line 12 establishes a stream that is constantly tracking for any Tweet mentions of your Twitter username from other users while the code is running. Consequently, you are able to keep up with the latest interactions on your account in real-time.
- Listen and Respond: Utilize the Stream.on Method to Create an Event Listener
-
- Listen for the Right Event: Unlock the Power of a String Parameter!
-
- Unlock Incredible Power With pressStart: A Comprehensive Tutorial On Event Handling!
- Unlock the Power of Your Code Repository with This Simple Configuration Trick!
 module.exports = {

consumer_key: process.env.consumer_key,

consumer_secret: process.env.consumer_secret,

access_token: process.env.access_token,

access_token_secret: process.env.access_token_secret,

};
{
consumer_key: '...',
consumer_secret: '...',
access_token: '...',
access_token_secret: '...'
}
Boost Your Visibility and Engagement – Learn How to Effectively Reply to Tweets!
// ... append to bottom of file:
function pressStart(tweet) {

var id = tweet.id_str;
var text = tweet.text;
var name = tweet.user.screen_name;

let regex = /(please)/gi;

let playerOne = text.match(regex) || [];
let playerTwo = playerOne.length > 0;

//this helps with errors, so you can see if the regex matched and if playerTwo is true or false
console.log(playerOne);
console.log(playerTwo);

// checks text of tweet for mention of SNESSoundtracks
if (text.includes(twitterUsername) && playerTwo === true) {

// Start a reply back to the sender
var soundtrackArrayElement = Math.floor(Math.random() * soundtrackArrayLength);
var replyText = ("@" + name + " Here's your soundtrack: " + soundtrackArray[soundtrackArrayElement]);

// Post that tweet
T.post('statuses/update', { status: replyText, in_reply_to_status_id: id }, gameOver);

} else {
console.log("uh-uh-uh, they didn't say the magic word.");
};

function gameOver(err, reply) {
if (err) {
console.log(err.message);
console.log("Game Over");
} else {
console.log('Tweeted: ' + reply.text);
}
};
}
- The pressStart function, defined on line 3, utilizes a tweet object as a parameter, representing a Tweet that has mentioned the bot. This tweet object contains a plethora of data, and the Twit client aids in filtering through it efficiently; consequently, allowing the bot to respond appropriately.
- Unlock the Power of 3: Extract Tweet ID, Text and Username to Respond Instantly!
- The code in lines 9-13 uses a regular expression (regex) to analyze the text of a Tweet object. Specifically, it searches for a keyword that you can set, such as ‘please’, that when matched will activate the bot to send a reply Tweet with a random soundtrack. As a result, users can politely engage with the bot and receive a response in kind.
- The /(please)/gi regex definition at the end of the expression denotes two separate options for execution – the “g” flag meaning global and the “i” flag meaning case-insensitive. Consequently, this expression will be applied globally and is not case-sensitive, ensuring a more comprehensive search.
-
- By default, a regex only looks for the first match in the text string; however, by using the ‘g’ option, all matches throughout the string can be returned. For instance, if a Tweet includes the word “please” three times, the regex will return all three matches.
-
- Discover How the “i Option” Ignores Capitalization and Enhances Your Writing!
- No Matches? No Problem – Setting the playerOne Variable to an Empty Array!
- Verifying Tweet Text with Regex: Discover How to Use the playerTwo Variable to Check if the Array playerOne Has Anything In It!
- Build a Perfect Reply Tweet with an if Block: Unlock the Power of Line 21-30!
- Maximize Your Bot’s Efficiency: Use the if Statement to Ensure Your Tweet Text Includes the Bot’s Name and Keyword!
- Time to Rock Out: Create a Reply Tweet with a Random Element of the Soundtrack List Array!
- Send Tweets Instantly – Leverage the Power of the T.post Method and Twitter API Endpoint!
- An object with two properties, status and in_reply_to_status_id, is passed to the T.post method; the status property is set to the replyText variable, and the in_reply_to_status_id is set to the id variable from the pressStart function. This allows Twit to identify which Tweet the bot replies to with the actual text, thus allowing for a reply to a Tweet from Twitter’s API.
- The T.post method is passed a gameOver callback function, which is defined on lines 34-41. This function prints either the reply Tweet to the console, or any errors returned from the Twitter API, after the POST request has been made.
- Otherwise, if the Tweet mention does not say “please”, the else block on lines 30-32 is invoked; this logs a quote from Jurassic Park to the console, illustrating why the bot didn’t tweet back.
Unlock the Power of Automation: Get Your Tweets Scheduled to Reach More Audiences!
File: snes.js
// ... append to bottom of file:

function pressSelect() {
var now = new Date();
const dateOptions = { weekday: 'long', year: 'numeric', month: 'long', day: 'numeric' };
const timeOptions = { timeZoneName: 'short' };
const dateString = now.toLocaleDateString("en-US", dateOptions) + " at " + now.toLocaleTimeString("en-US", timeOptions);

var soundtrackArrayElement = Math.floor(Math.random() * soundtrackArrayLength);
var weeklyText = soundtrackArray[soundtrackArrayElement] + " Here's your soundtrack for " + dateString;
T.post('statuses/update', { status: weeklyText }, gameOver2);

function gameOver2(err, reply) {
if (err) {
console.log(err.message);
console.log("Game Over");
} else {
console.log('Tweeted: ' + reply.text);
}
}
}

const job1 = schedule.scheduleJob(rule, pressSelect);
Automate Your Twitter Presence with a Link to a Soundtrack – PressSelect Function Does the Work For You!
- Using a conjunct adverb, this content can be summarized as follows: Likewise, a weeklyText string is crafted and slightly modified to become an original Tweet, including an element from the soundtrack list array.
- The T.post method is invoked with the same statuses/update API endpoint, and no in_reply_to_status_id property is passed; accordingly, the function is composing an original Tweet, not a reply.
- Although the gameOver callback function is present on lines 13-20, it has been renamed to gameOver2 to prevent any name conflicts; even though both gameOver and gameOver2 are local variables within their respective functions, we have changed the name merely for safety.
- After the pressSelect definition, line 23 invokes the node-schedule module’s scheduleJob function and stores the result in the job1 variable, thus completing the setup of periodic scheduled Tweets. Notably, this function requires two arguments: the trigger time and the job to be executed.
-
- Unlock the Power of Automation: Run Your Scheduled Job Once a Week on Mondays
-
- Advanced Functionality at Your Fingertips: Introducing pressSelect!
Transform Your Code into a Powerful Piece of Software with GitHub!
Unlock the Power of GitHub: Easily Commit and Push with GitHub Desktop!
- Effortless Commitment of New Files – Open GitHub Desktop on Your Workstation Now!
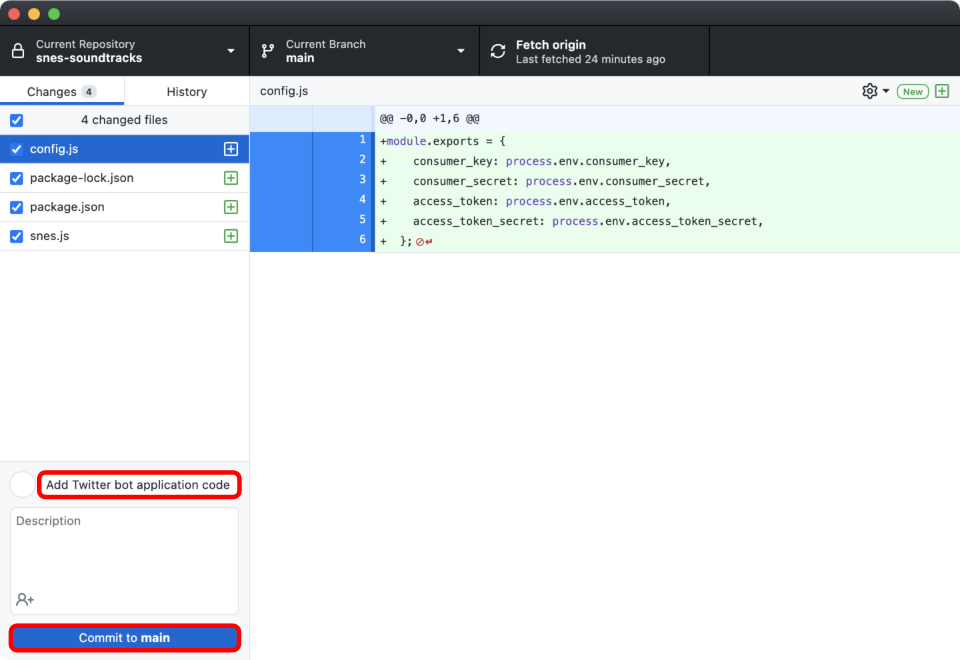
- Introducing the New Twitter Bot Application Code – Committing to a More Robust User Experience!
-
Commit to Success – Press the Main Button Now to Create a New Commit on Your Repository!
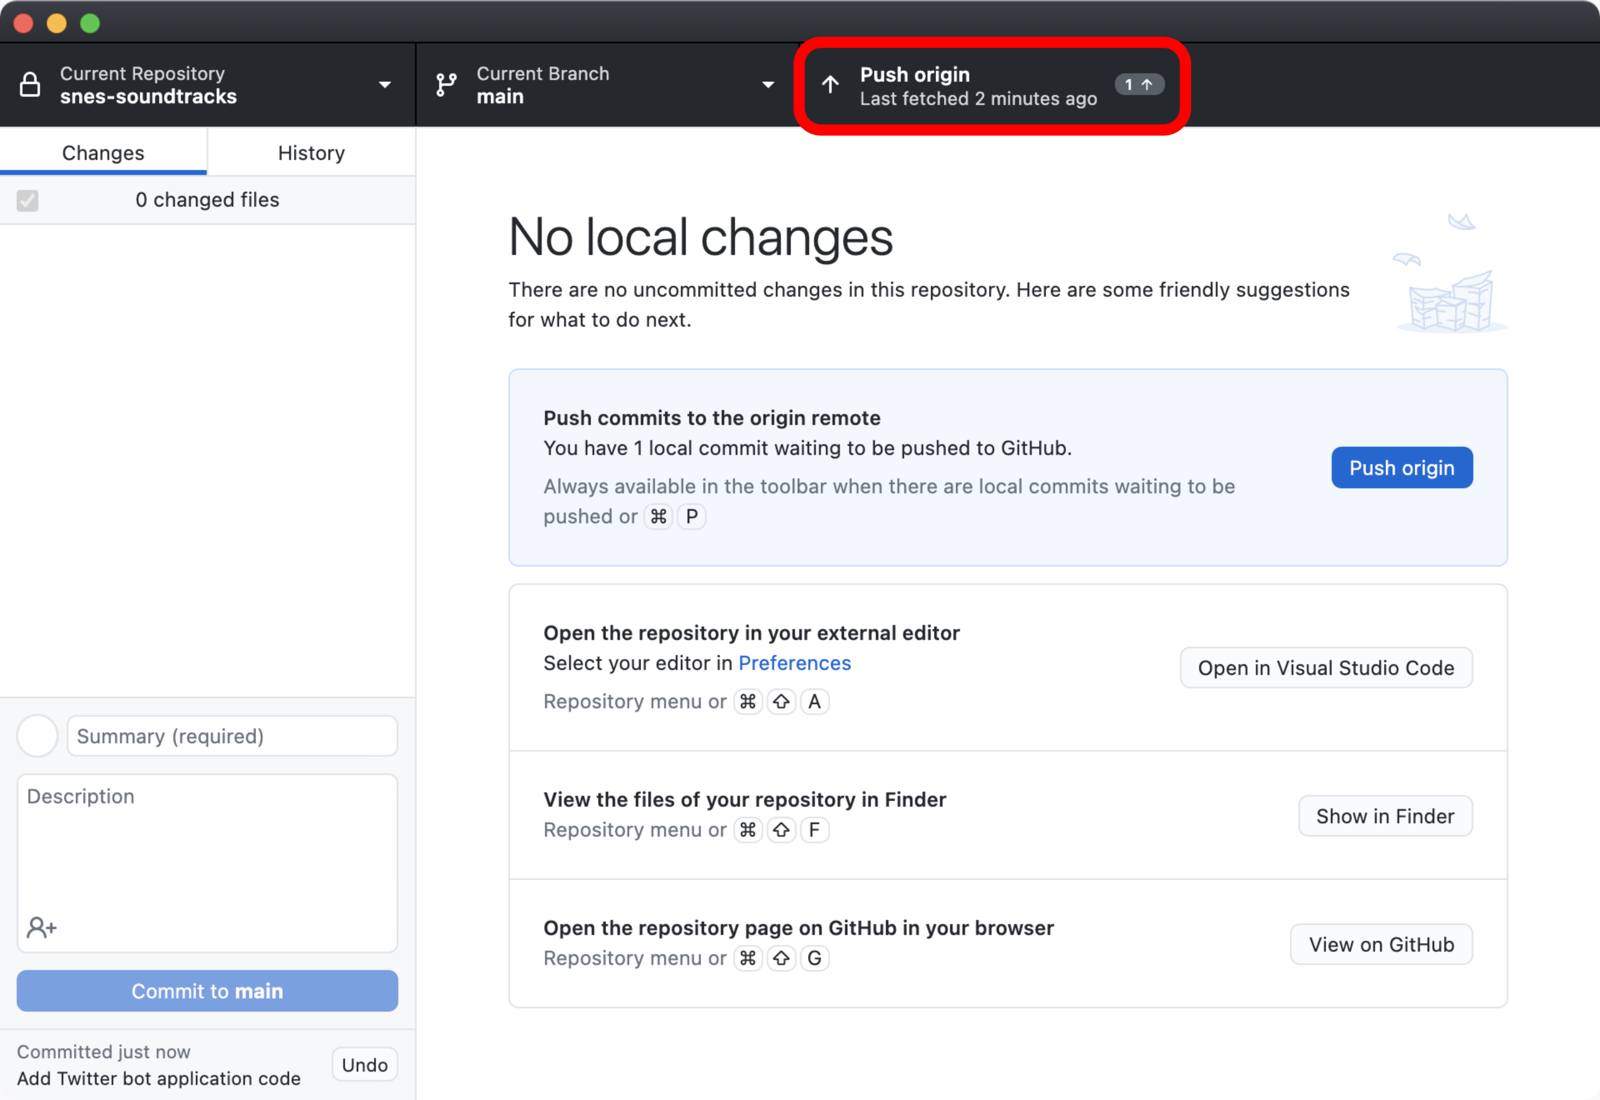
- Easily Push Your New Commit to Your GitHub Repository – Just Click the Push Origin in the Top Navigation!
Unlock the Power of Git Command Line: Learn How to Commit and Push with Ease!
- Get Ready to Take Your Code to the Next Level – Run Your Local Repository Now!
git statusOn branch main Your branch is up to date with 'origin/main'. Untracked files: (use "git add <file>..." to include in what will be committed) config.js package-lock.json package.json snes.js