
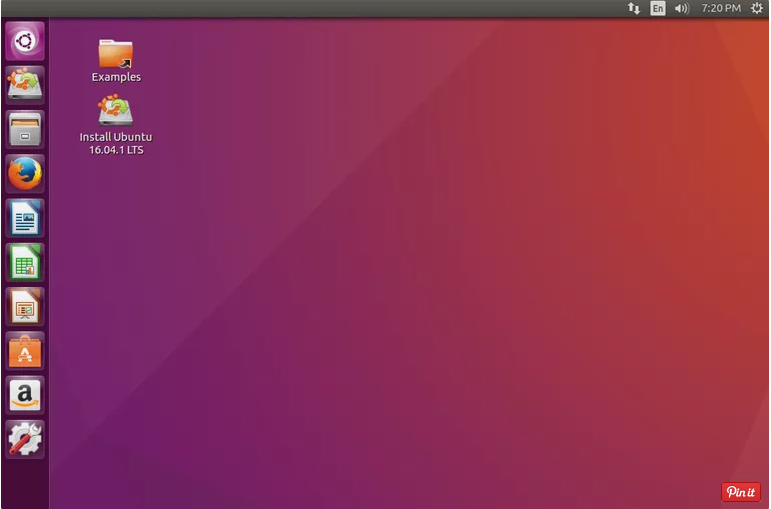
UEFI Bootable Ubuntu This guide shows you the way to create a bootable Ubuntu USB power so as to paintings on UEFI based and BIOS-primarily based systems …
Bootable Ubuntu USB Drive
As an additional bonus, this guide can even show you how to make the drive chronic in order that changes made in the stay mode are stored for each subsequent boot.
For this manual, you’ll want a blank USB drive with as a minimum 2 gigabytes of area and an internet connection.
UEFI Bootable Ubuntu
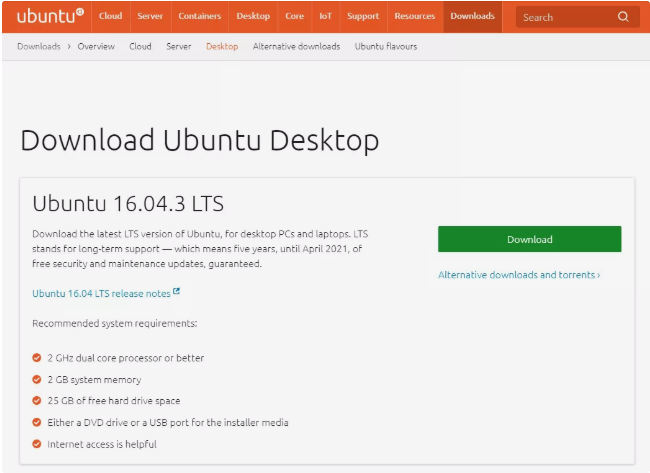
UEFI Bootable Ubuntu Choose the Version Of Ubuntu to Download
There will constantly be 2 variations of to be had for download. The version on the pinnacle can be the present day long-term support release and that is designed for most of the people of customers.
Currently, the lengthy-time period aid version is sixteen.04 and it guarantees 5 years really worth of assist. Whilst you operate this model you’ll acquire safety updates and application updates however you won’t get new functions which can be launched. The LTS version gives a super stage of stability.
Choose the Version Of Ubuntu to Download
At the lowest of the page, you’ll locate the trendy model of Ubuntu that’s currently 16.10 however in April this can end up 17.04 and then on October 17.10. This model has all of the state-of-the-art capabilities however the guide length is tons shorter and you are anticipated to upgrade to every next release in turn.
Click the download hyperlink next to the version you wish to apply.
UEFI Bootable Ubuntu
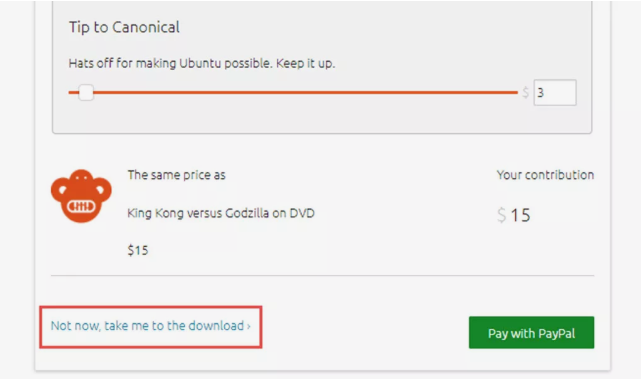
UEFI Bootable Ubuntu Lots of cash goes into making the Ubuntu working system and the developers like to be paid for their paintings.
After you click the down load hyperlink you’ll be presented with a listing of sliders asking you to donate as little or as a whole lot to every portion of the running device’s improvement as you wish to accomplish that.
Download Ubuntu for Free
Most human beings don’t need to pay for something without knowing what they’re getting.
To pay absolutely not anything for Ubuntu click on the Not now, take me to the down load link at the lowest of the web page.
The Ubuntu ISO image will now be downloaded in your laptop.
UEFI Bootable Ubuntu
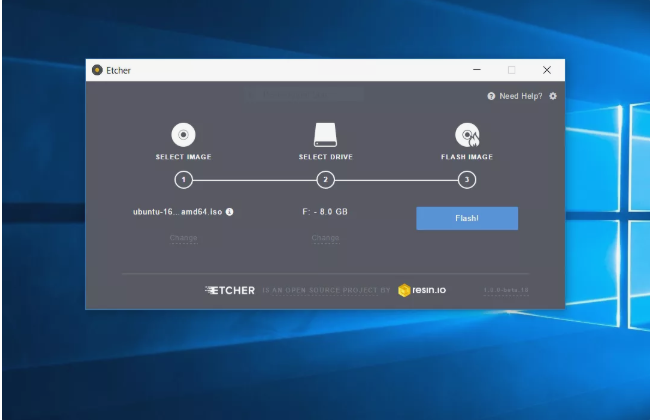
UEFI Bootable Ubuntu The first-rate tool for creating a Ubuntu USB pressure is Balena Etcher. It’s a free software. Use those instructions to down load it and create a Ubuntu USB pressure.
- Click the large inexperienced download link at the pinnacle of the web page.
- After the down load has completed, click on the Etcher executable record. A setup display screen will seem. All you need to do is click Install.
- When the software program has been completely established click on the Finish button. Etcher must start routinely.
- Insert a clean USB drive into one of the USB ports for your laptop.
- Press the Select button and navigate to the Downloads folder to discover the Ubuntu ISO photo downloaded in step 2.
- Click Select Drive and pick out the letter of the USB power which you inserted.
- Click Flash.
- Ubuntu might be written to the drive and a validation routine will run. After it has completed you may be able to boot into Ubuntu.
Create the Ubuntu USB Drive Using Etcher
UEFI Bootable Ubuntu If you in reality reboot your laptop you is probably amazed while it boots instantly into Windows. This is because Windows is typically set to boot earlier than something else on most manufacturer’s computers.
However, you may override the boot order. The following list suggests you the important thing to press relying on the producer of your computer:
- Acer – Escape, F9 or F12
- Asus – Escape or F8
- Compaq – Escape or F9
- Dell – F12
- eMachines – F12
- HP – Escape or F9 (in a few cases you want to press Escape and then F9)
- Intel – F10
- Lenovo – F8, F10, F11 or F12
- NEC – F5
- Packard Bell – F8
- Samsung – Escape or F12
- Sharp – F2
- Sony – F10 or F11
- Toshiba – F12
Create the Ubuntu USB Drive Using Etcher
If your pc isn’t listed right here, there are a whole lot of locations to find lists of extra hotkeys for the Boot menu.
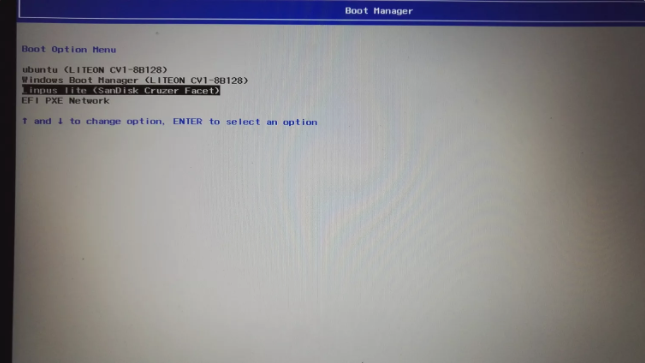
Press and keep the applicable function key before your laptop boots. Keep maintaining the important thing until a boot menu display screen hundreds similar to the one within the photograph.
If the keys above don’t paintings for your specific make strive one of the other feature keys. Manufacturers frequently trade them with no warning.
When the boot menu appears click the option which suits your USB drive.
Make the Ubuntu USB Drive Persistent
To make it possible to put in applications and keep settings on a stay USB power you want to make it persistent.
Ubuntu looks for a report referred to as casper-rw in the root partition in an effort to offer staying power.
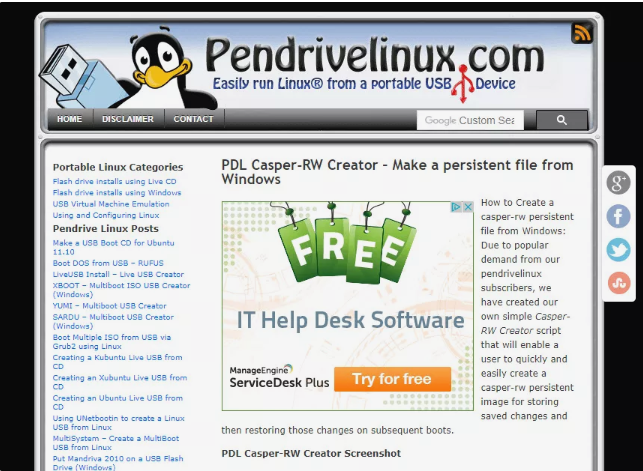
To create a casper-rw document the usage of Windows you could use a piece of software from pendrivelinux.
Make the Ubuntu USB Drive Persistent
Com referred to as PDL Casper-RW Creator. Download the application by using clicking the hyperlink after which double click on the executable to open it.
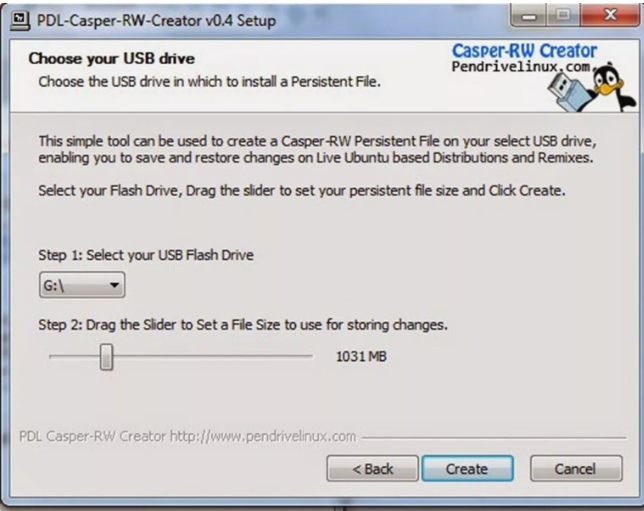
Make positive your Ubuntu USB pressure is inserted and pick the drive letter inside Casper-RW Creator.
Now drag the slider across to determine how massive you want the Casper-RW record to be. (The bigger the report, the greater you could store).
Click Create.
Edit Grub to Add Persistence
To get your USB force to apply the Casper-RW record open up Windows Explorer and navigate to /Boot/Grub.
Edit the file grub.Cfg by way of right-clicking the record and selecting Open With after which Notepad.
Look for the following menu access textual content and add the phrase continual as shown in formidable underneath.
menuentry "Try Ubuntu without installing" {
set gfxpayload=keep
linux   /casper/vmlinuz.efi file=/cdrom/preseed/ubuntu.seed boot=casper quiet splash persistent --
initrd   /casper/initrd.lz
}
Save the report.
Reboot your computer whilst preserving down the shift key and boot back into Ubuntu.
Programs and settings will now be remembered every and whenever you boot into Ubuntu from the USB force.