
Overview
Configure LAMP, stands for ‘Linux’, ‘Apache’, ‘MySQL’, and ‘PHP’. All of those additives collectively make up the LAMP ‘net stack’ that is one of the maximum famous answers to host websites.
This article explains a way to deploy the LAMP stack in your DreamCompute example.
Configure LAMP,Setup methods
There are two ways installation a LAMP stack to your DreamCompute instance:
- Automated
- Manually
If you just want to speedy configure LAMP to get some thing up and running, the automatic answer ought to be satisfactory.
However, if you’re creating a long time solution to host internet content, it’s endorsed you install every element one by one as you may have the maximum control over their installation.
Configure LAMP,Automated (Ubuntu only)
You can use ‘tasksel’ to definitely inform Ubuntu to put in the “assignment” named lamp-server. This is done with apt-get and making sure to use a caret (^) on the end of the name of the venture.
[user@server]$ sudo apt-get update
[user@server]$ sudo apt-get install lamp-server^
The 2d command is interactive, so you’ll be asked ‘Do you need to keep?’ in a few places. Always kind ‘y’ to hold.
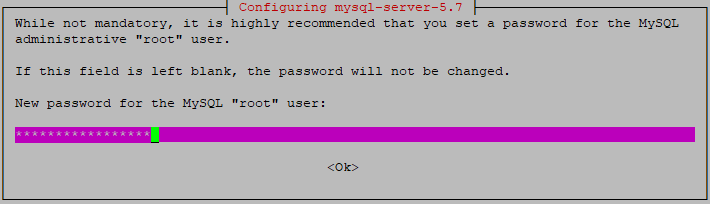
You will also be requested to set a password for the basis consumer of your MySQL set up. Create a cozy password and save it as you will want this later while you configure a database.
Configure LAMP,Manual installation
You also can deploy Apache, MySQL, and PHP for my part. The gain of doing it this way is that you’ll have a higher know-how of what you’re installing and a way to configure your environment to fit your wishes. View the subsequent articles for commands on a way to manually installation Apache, MySQL, and PHP.
Make positive to usually run an replace earlier than installing new software:
[user@server]$ sudo apt-get update