
Master some cool tools in Adobe’s vector illustration software with our quickfire guide.
Adobe Illustrator for beginners, Adobe Illustrator is a vector drawing device, meaning you may create art work that can be scaled infinitely with none loss of great.
It’s a superb device for emblem layout, creating complicated vector paintings and gambling with illustrated typography design.
But coming from Photoshop you may not be savvy with Illustrator and its unique methods: so we’re here to help.
Adobe Illustrator for beginners, From the use of Bézier factors and curves to strokes and fills and adding a greater natural look in your vector paintings, study on for a few Illustrator secrets for those new to the application.
01. Adobe Illustrator for beginners,Get to grips with Bézier
Adobe Illustrator for beginners, Bézier points and curves are the aspect you want to master in case you’re going a good way to use Illustrator to create – well, just about anything.
Whilst as an alternative tricky to get to grips with in the beginning, Bézier control points and curves provide the liberty to create just about any shape you can think of.
Manipulating factors controls the curves, and using the Alt/Shift keys along with the pen device (clicking on a curve to feature more control points as an example using Alt) you may start to define complicated organic shapes very quickly in any respect.
The satisfactory recommendation is to exercise and find out for your self how they work.
02. Adobe Illustrator for beginners,Bézier shortcuts
Adobe Illustrator for beginners,But a brilliant tip for controlling Bézier curves with greater accuracy is to apply the Alt key after you’ve created a factor.
Hold down the Alt key after creating a factor and you can role the next factor without manipulating the curve.
In addition, retaining down Shift will snap your next point to a forty five-diploma perspective.
By the usage of these kind of shortcuts you may without problems trace raster pix in Illustrator (perhaps for a logo layout and so forth).
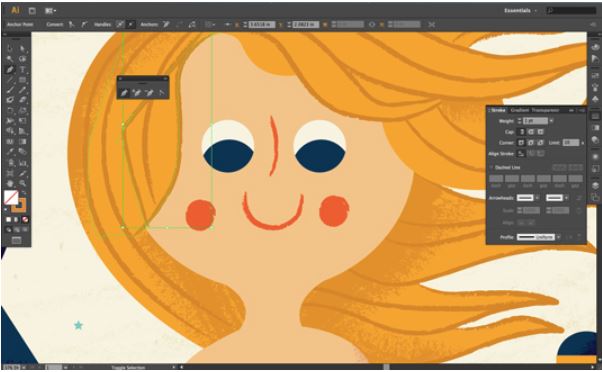
03. Adobe Illustrator for beginners,Strokes and paths
Adobe Illustrator for beginners,By default, Illustrator strokes your direction (whether created using the Pen tool or a shape device, and so forth) with a 1pt black (and fills your shape with white if you join up the factors).
You can change the color or fill the use of the swatches panel (or certainly the device options bar on the top of the interface).
The small stroke and fill device below the principle tool panel helps you to change among the 2 whilst the item is chosen.
Using the Strokes panel you can adjust the burden and kind of stroke, as well as wherein the stroke is applied (from CS6).
04. Adobe Illustrator for beginners, The Appearance panel
To get a brief overview of your strokes and fills at any time (at the side of any outcomes you’ve got carried out) use the Appearance panel.
You also can speedy change the stroke and fill type and color from here, along with opacity. If you have carried out an impact, you may quickly click on the call of it to go returned and tweak it. Incredibly beneficial.
05. Adobe Illustrator for beginners, Easy brushes
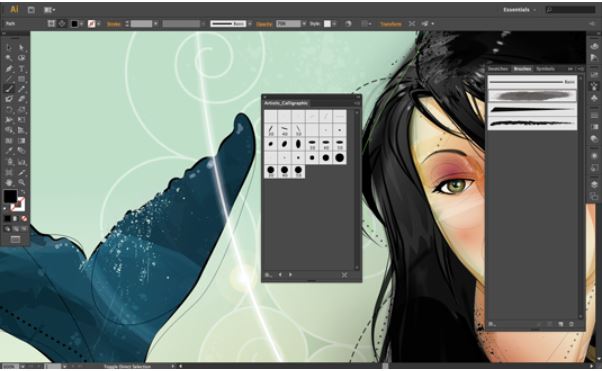
If you thought Illustrator and vector pics become about solid shapes and non-natural media results, assume again.
You can, using the Brushes panel and Illustrator’s huge range of brush libraries, speedy apply, for instance, paint strokes in your strains.
Double-clicking the brush in the Brushes panel permits you to edit it – and those adjustments can be contemplated mechanically in your example.
You may even create brushes from scratch using vector pics you’ve got designed. The opportunities are infinite.
06. Adobe Illustrator for beginners, Use the Symbolism tools
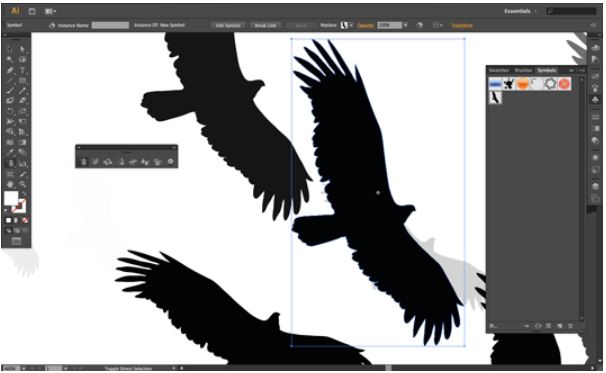
Similarly, Symbols are a extremely good manner of making complicated art work quickly. Say you need a flock of birds.
Simply draw one fowl, then select it and using the Symbols panel arrow menu, you can turn it into a symbol. Next, choose the Symbol Sprayer from the device panel and spray it around your page.
You can then use the alternative Symbolism tools to resize, shade and rotate best sure times of the image, giving a extra herbal effect. Try it, it’s very easy!
07. Adobe Illustrator for beginners, Warp with ease
If your items are searching a bit uniform, you can use the effects equipment to warp, roughen, pucker, bloat and generally subtly alternate their look.
In the Tool panel, click and hold at the Width device to deliver out the results tools flyout. Then, use one or every device (they may be brush-primarily based) to softly warp and tweak your item. By double-clicking on each tool in the flyout, you can change options – so experiment!
08. Quickly edit type
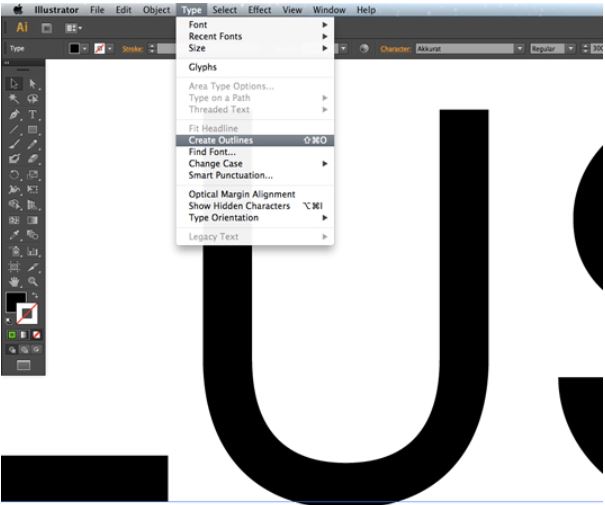
One of the first-rate things approximately Illustrator is its amazing type equipment. It’s notable for laying out kind as part of an instance, however higher for modifying type.
Type out a font, make it larger using the Character panel or Tool Options bar. Then select the box the sort is in (no longer the textual content itself) and visit Type>Create Outlines.
You can now edit the letters as you notice fit by means of adjusting the Bézier factors. It’s extraordinary for experimenting with new variations on standard fonts. And there’s a few even better stuff coming with Illustrator CC.
09. Selecting similar objects
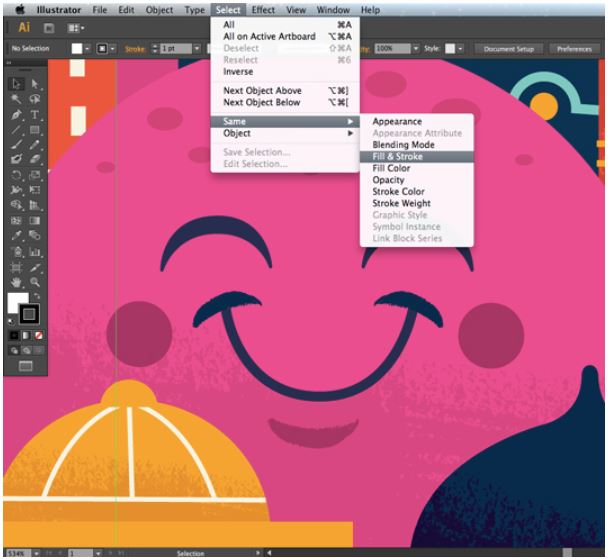
Once you’ve come to be aware of drawing extra complicated shapes in Illustrator and feature built up an illustration, you can want to exchange the shade of many objects straight away.
But some of those objects can be partly hidden beneath others, and there can be in reality loads of them!
So to make matters simpler, pick out one in every of your objects after which go to Select>Same after which pick the choice you want (perhaps Fill Colour).
All your items with that fill coloration will then be selected and you could change them suddenly by way of using the swatches panel.
10. Easy blends
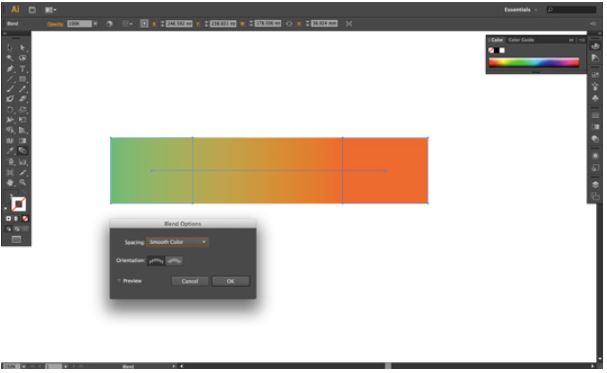
There are some methods to create gradients in Illustrator (the Gradient panel and Gradient Mesh equipment are worth experimenting with and getting your head around) however a extraordinary manner is to apply the Blend device.
Simply create shapes with specific coloration fills (for a gradient impact choose no stroke) and then, with the Blend tool decided on, click on the first item and then the second one.
If you double-click on the Blend device within the Tool Panel before doing this you could change the sort of blend it applies (and if you keep your combo items decided on it will practice the modifications to that blend).
11. Use presets with the new Pencil Tool
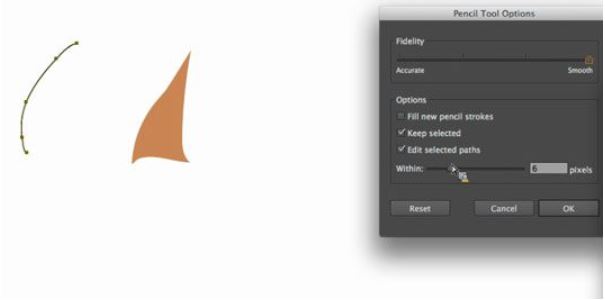
If you are the usage of Illustrator as part of the Creative Cloud then the Pencil Tool now helps you to use short presets to create a easy, fluid direction with fewer points, or a course that extra closely fits your drawing intent.
As nicely as curves, you may now use the Pencil Tool to effortlessly draw directly lines too, which you may constrain to zero, forty five and 90 diploma angles if you select.
Adobe’s additionally introduced the capacity to hold drawing from the cease points of an existing direction, and you can now near your paths with a curved or immediately line.